DevSecOps with OpenShift Platform Plus (60 mins)
Introduction
This section will showcase how OpenShift Platform Plus (OPP) can be used to provide a comprehensive DevSecOps workflow, with a focus on Software Supply Chain Security throughout the entire process, from development to production. DevSecOps stands for Development, Security and Operations, and is a holistic approach that promotes continuous security within your DevOps practices. Our example will highlight capabilities such as defining CI/CD pipelines CD with security gates, image scanning and signing, secure storage in a Trusted registry, and deployment to secured clusters with advanced security monitoring and alerting.
Let’s examine all the components involved in such a DevSecOps pipeline to deploy our e-commerce application named Globex.
Advanced DevSecOps Pipeline
In this section, we will have a look at the end-to-end DevSecOps pipeline and explore the security gates that are provided in it.
-
Login to the openshift console using user {user} and password {password} using this URL: {openshift_console_url}
-
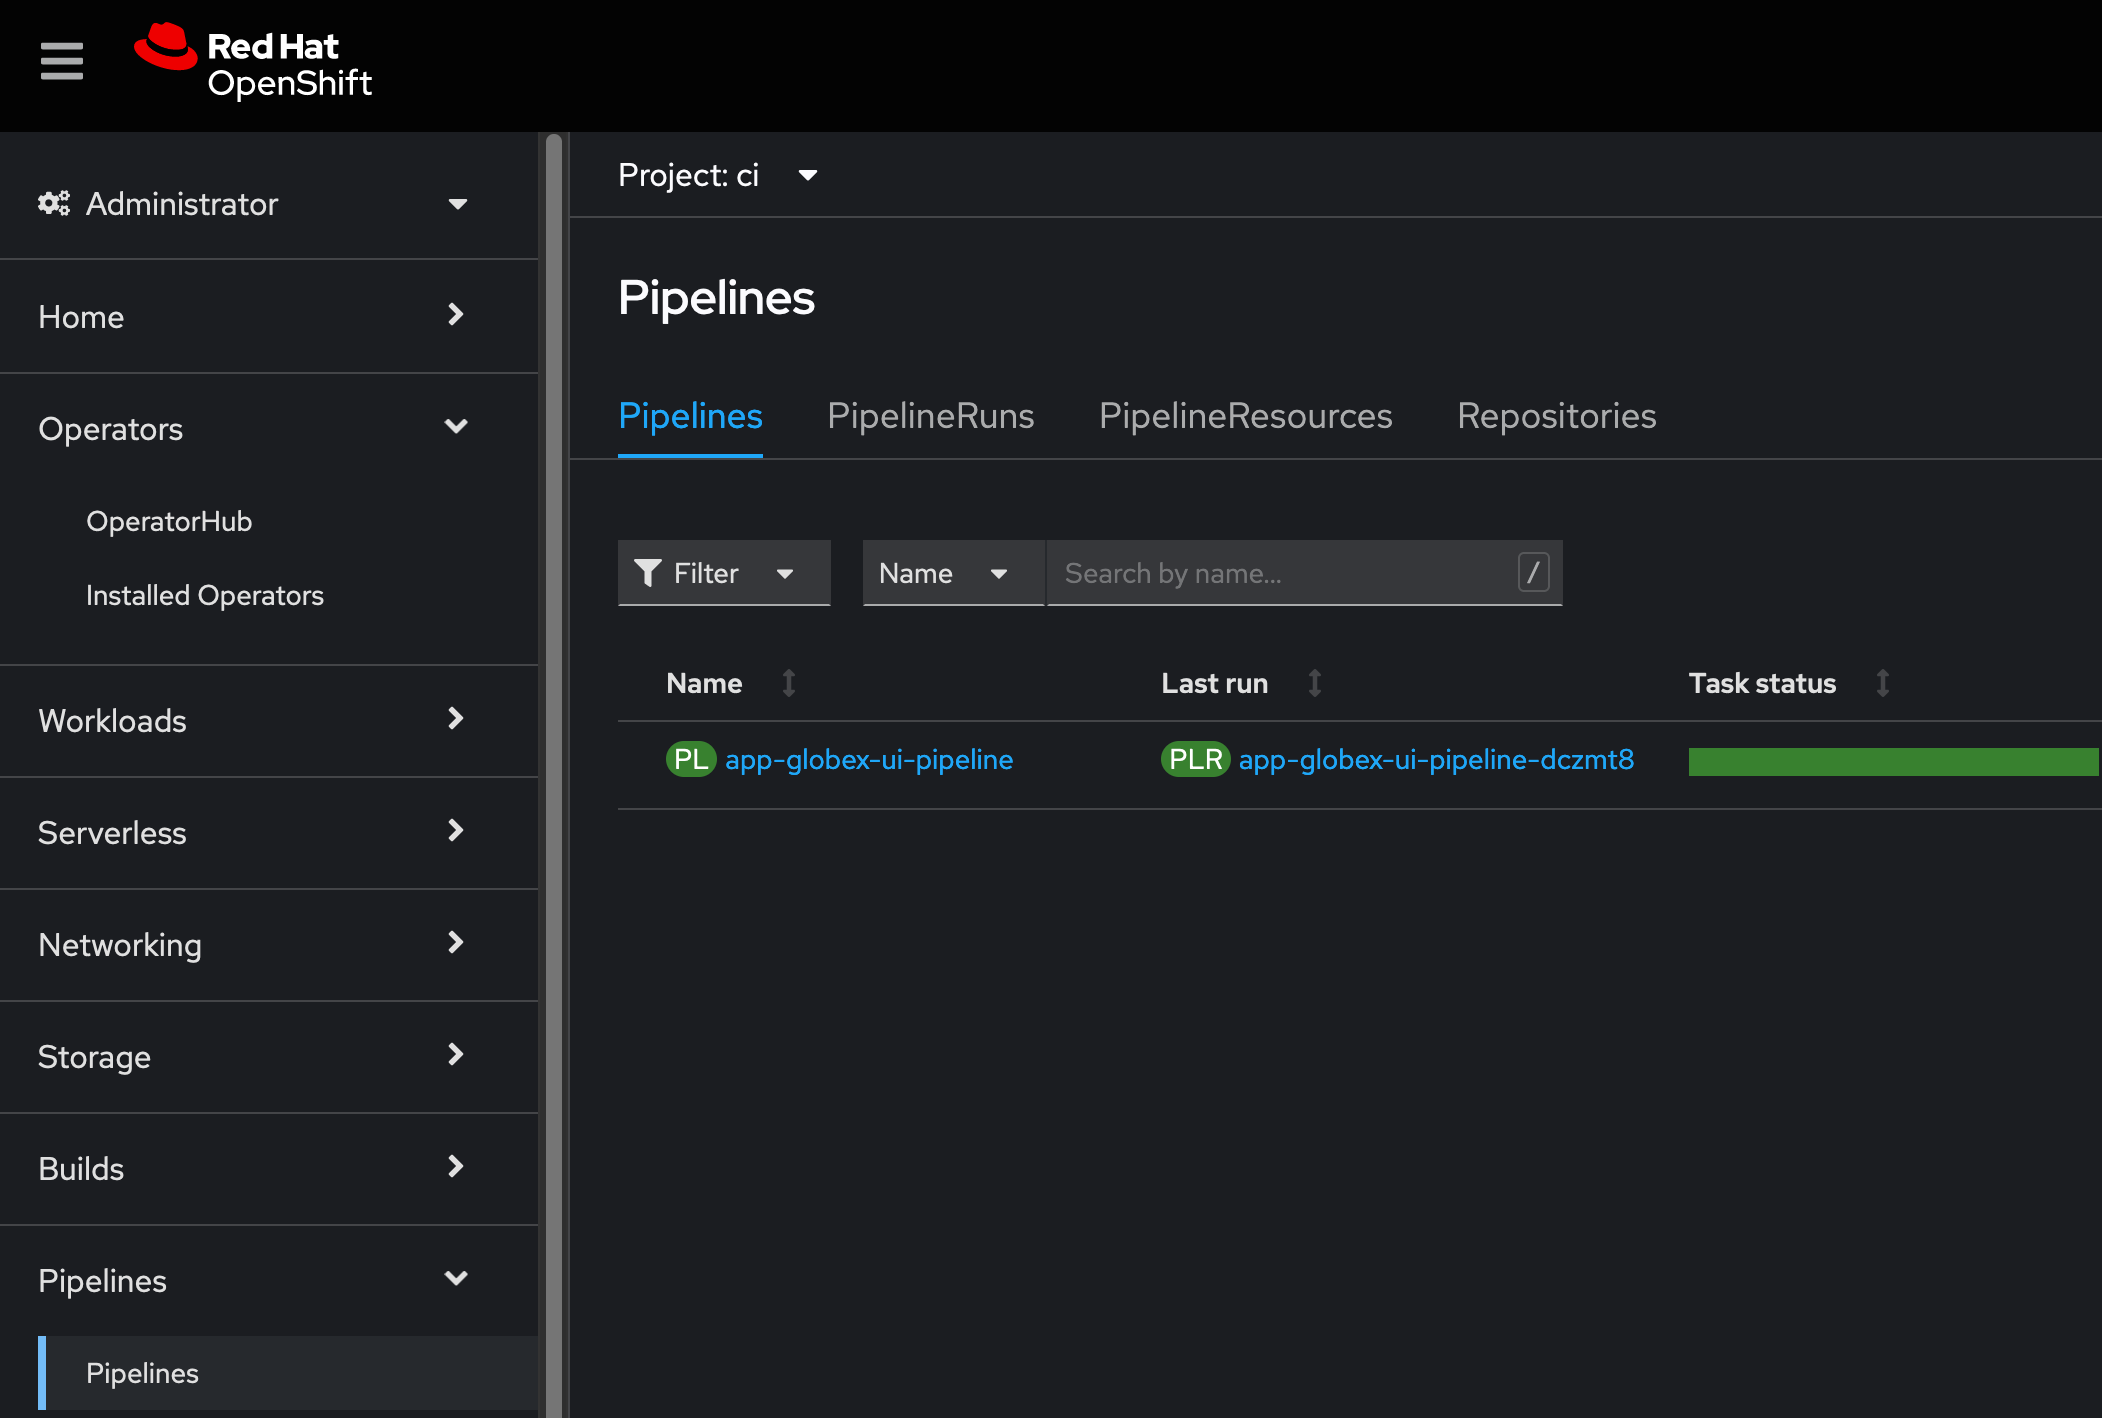
In the openshift console left menu, Select the Administrator View, then click on Pipelines → Pipelines, select Project "{user}-cicd", as shown in the screenshot below.
-
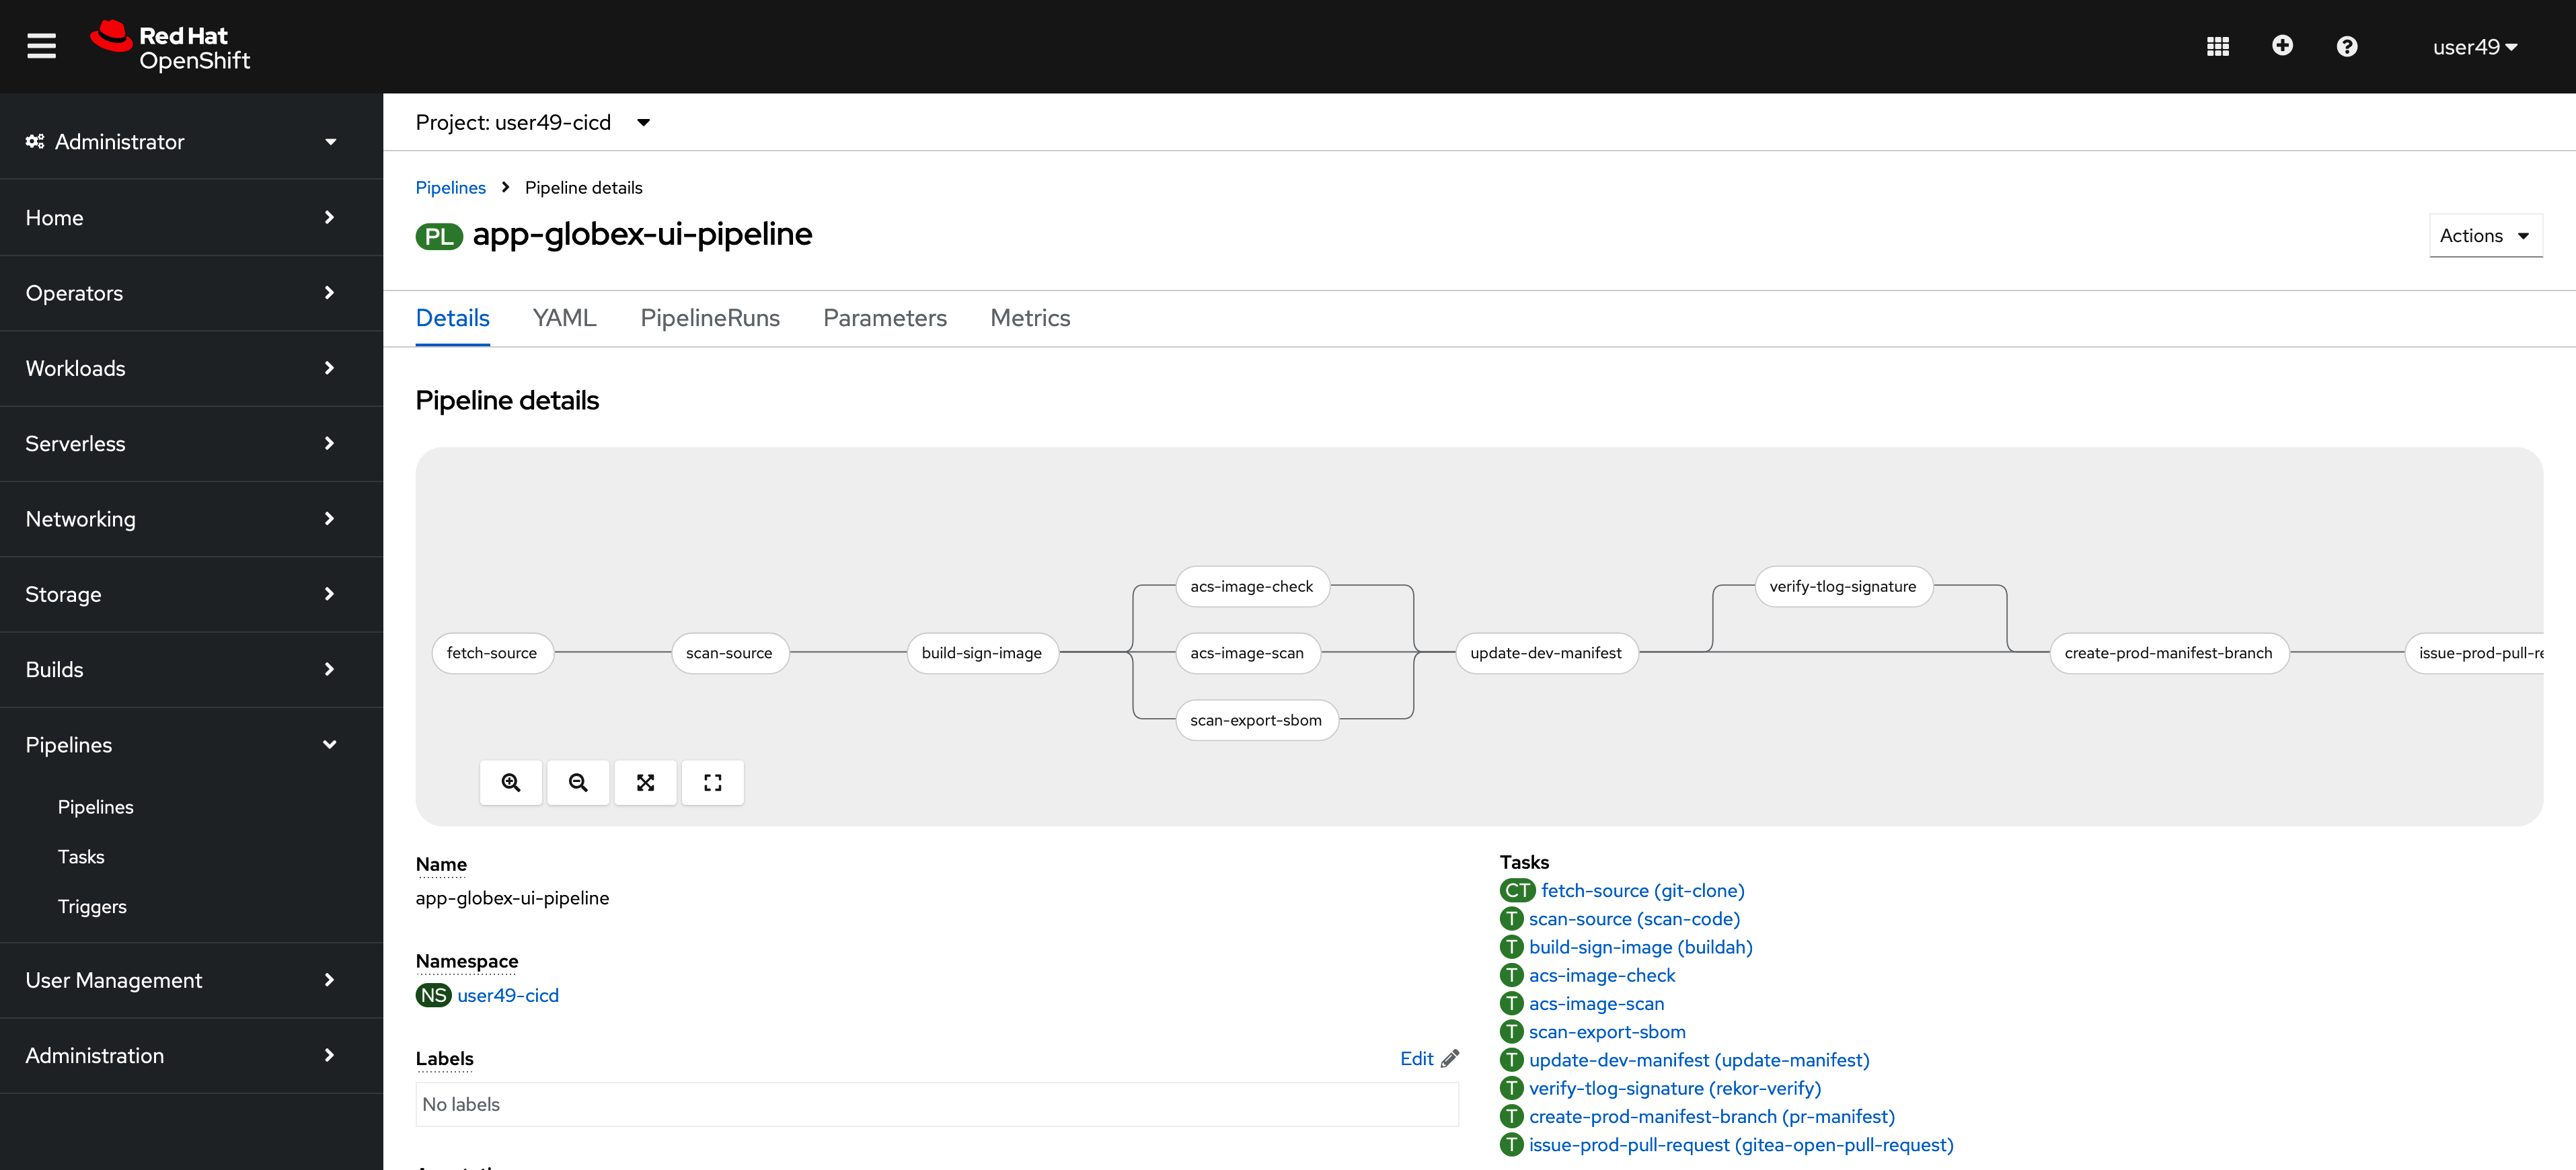
Let’s have a look at the more advanced devsecops pipeline called "app-globex-ui-pipeline". Click on the pipeline name to get a graphical view.
-
From the left side menu, select Pipelines → Pipelines. In the right-side window, select the "PipelineRuns" tab, we can see that the pipeline hasn’t been run yet.
Before we do that, let’s review the repositories in Gitea that will be used by this pipeline to deploy the application using OpenShift GitOps.
Login to Gitea to review the repositories
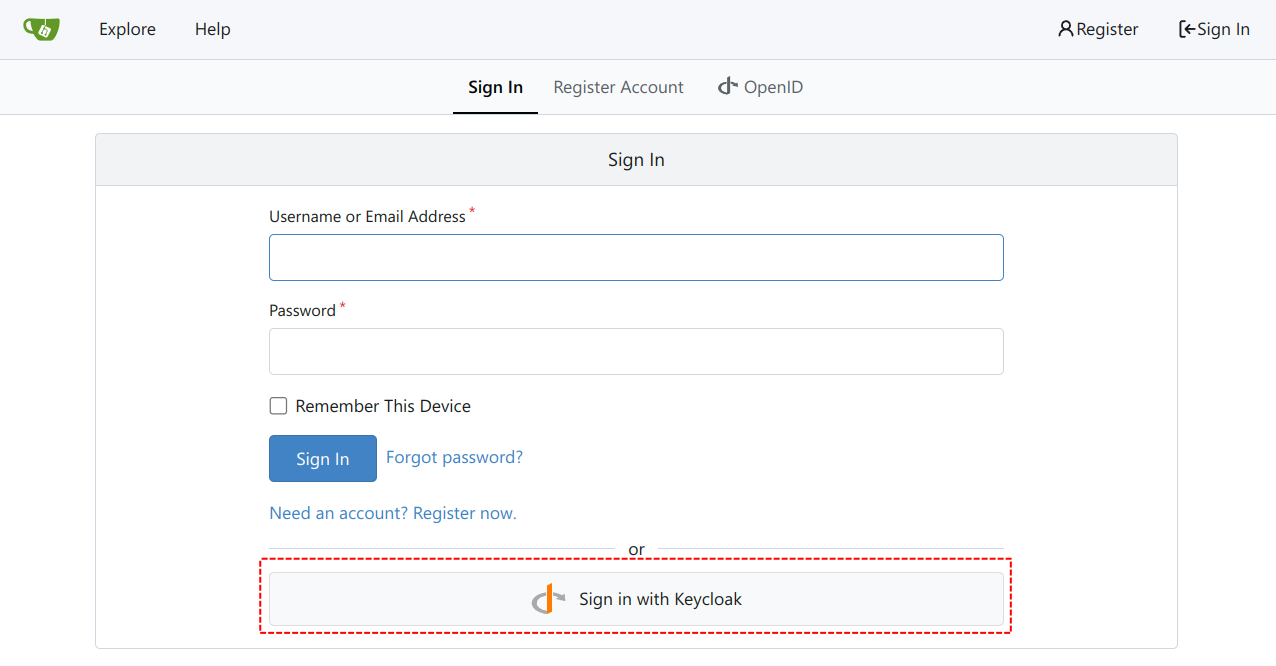
We are using Gitea as our source control system for this workshop. To access Gitea, click on this URL: https://gitea-gitea.{openshift_cluster_ingress_domain}, and then login using Keycloak. Do not login directly with {user} credentials.
When you login, your Keycloak account will be automatically linked with the pre-created {user} account giving you access to the existing source code repositories as shown below:
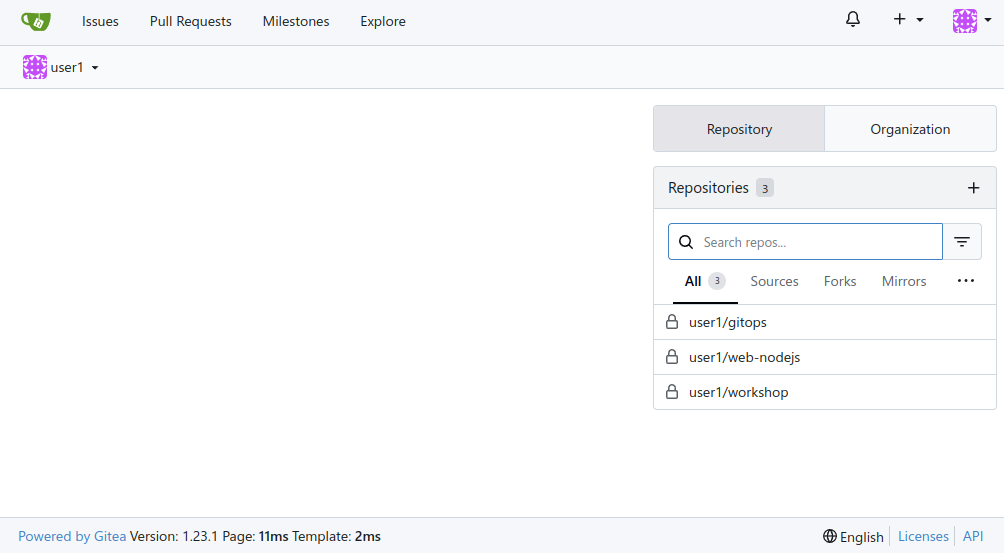
The pre-created repositories are as follows:
-
{user}/gitops - This has the GitOps manifests for the Application that are deployed across environments.
-
{user}/web-nodejs - The source code for the front-end Coolstore web application that our pipeline will be building.
-
{user}/workshop - The source content for this workshop including example files we used in previous modules.
| While these repositories will disappear when the workshop environment is terminated, you can review the public version of these in the GitHub organization here https://github.com/AdvancedDevSecOpsWorkshop. |
Start the Pipeline
We see that the pipeline hasn’t been run yet, so let’s trigger it using a "PipelineRun".
-
Now run this command to trigger the pipeline execution:
cat ~/workshop/content/modules/ROOT/examples/devsecops-pipelinerun.yaml | sed 's/$USERNUM/{usernum}/' | sed 's/$USER/{user}/' | sed 's/$SUBDOMAIN/{subdomain}/' | oc create -f - -n {user}-cicdHere’s a look at the content of the pipelineRun used to trigger the pipeline. These are the main parameters that are used by the pipeline tasks to deploy the application:
apiVersion: tekton.dev/v1
kind: PipelineRun
metadata:
  generateName: app-globex-ui-pipeline-
spec:
  params:
    - name: REPO_HOST
      value: gitea-gitea.$SUBDOMAIN
    - name: GIT_REPO
      value: 'https://gitea-gitea.$SUBDOMAIN/$USER/web-nodejs.git'
    - name: TLSVERIFY
      value: 'false'
    - name: BUILD_EXTRA_ARGS
      value: $(tt.params.build_extra_args)
    - name: IMAGE_REPO
      value: registry-quay-quay-operator.$SUBDOMAIN/workshop$USERNUM/globex-ui
    - name: IMAGE_TAG
      value: main-b183894cabd3eebaa5844143d5ac60dc9863fb57
    - name: MANIFEST_FILE
      value: globex/overlays/dev/kustomization.yaml
    - name: MANIFEST_FILE_PROD
      value: globex/overlays/prod/kustomization.yaml
    - name: MANIFEST_REPO
      value: 'https://gitea-gitea.$SUBDOMAIN/$USER/gitops'
    - name: MANIFEST_REPO_NAME
      value: $USER/gitops
    - name: COMMIT_SHA
      value: b183894cabd3eebaa5844143d5ac60dc9863fb57
    - name: GIT_REF
      value: main
    - name: COMMIT_DATE
      value: '2024-11-03T22:04:11Z'
    - name: COMMIT_AUTHOR
      value: $USER
    - name: COMMIT_MESSAGE
      value: |
        Updates for starting scenario.
    - name: SONARQUBE_HOST_URL
      value: 'https://sonarqube-$USER-cicd.$SUBDOMAIN'
    - name: SONARQUBE_PROJECT_KEY
      value: globex-ui
    - name: SONARQUBE_PROJECT_SECRET
      value: sonarqube-admin
    - name: CYCLONEDX_HOST_URL
      value: 'https://cyclonedx-bom-repo-server-cyclonedx.$SUBDOMAIN'
  pipelineRef:
    name: app-globex-ui-pipeline
  taskRunTemplate:
    serviceAccountName: pipeline
  timeouts:
    pipeline: 1h0m0s
  workspaces:
    - name: shared-data
      volumeClaimTemplate:
        metadata:
          creationTimestamp: null
        spec:
          accessModes:
            - ReadWriteOnce
          resources:
            requests:
              storage: 3Gi
        status: {}
    - emptyDir: {}
name: maven-settings-
Let’s observe the pipeline running. Open the openshift URL, click on pipelines, then select PipelineRuns
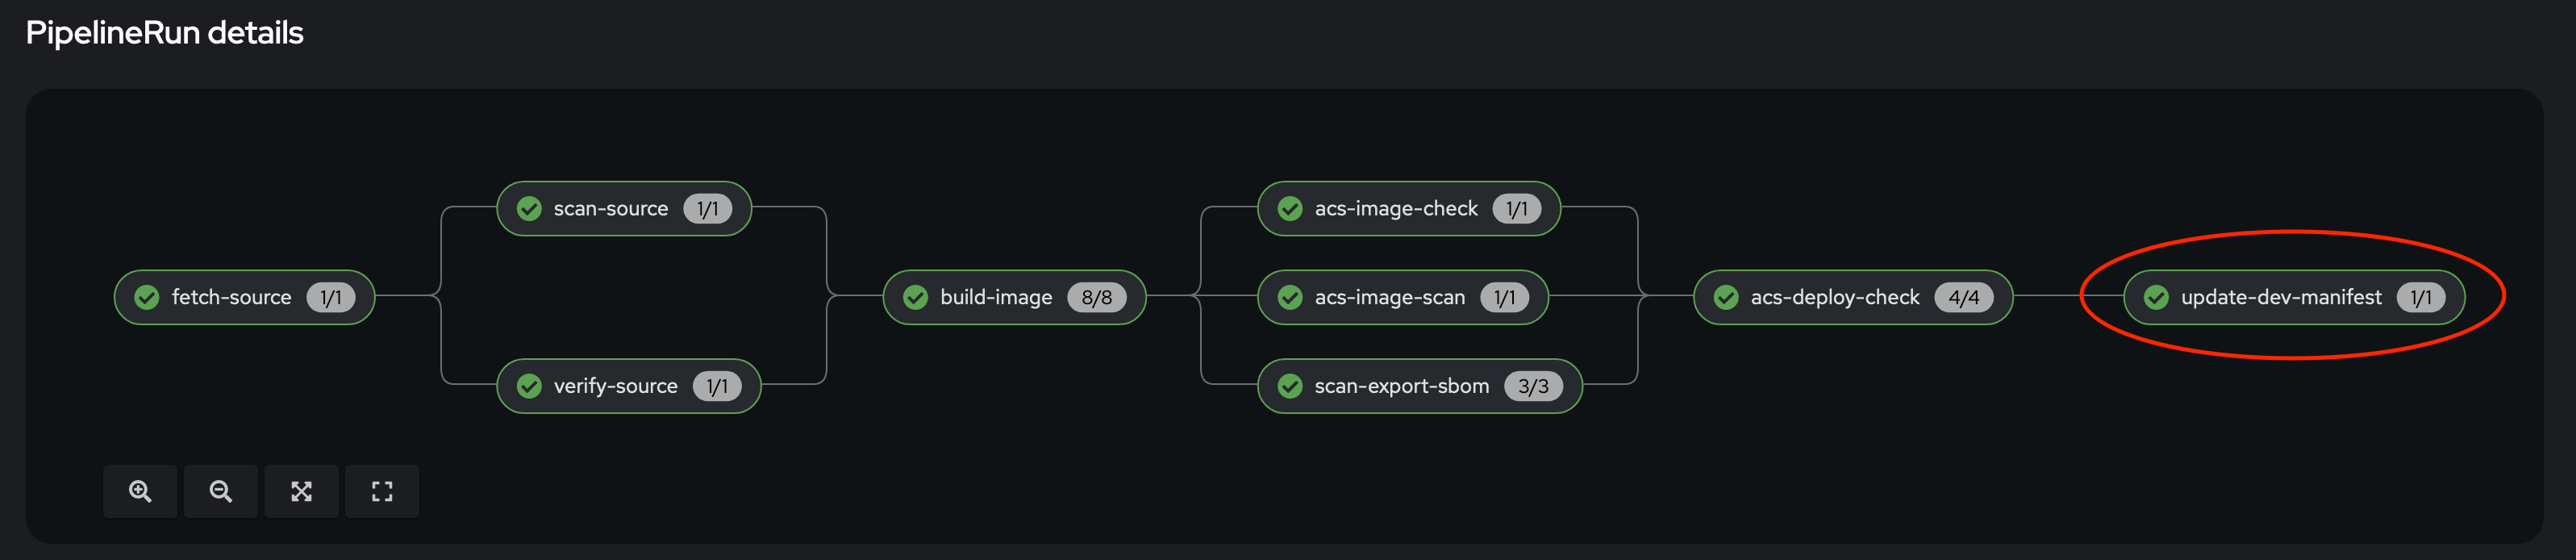
This will take you to a diagram with the last pipeline execution. Let’s now examine the different steps, and focus on the tasks that provide an extra layer of security. In you want more details, you can click on each task to see the logs.
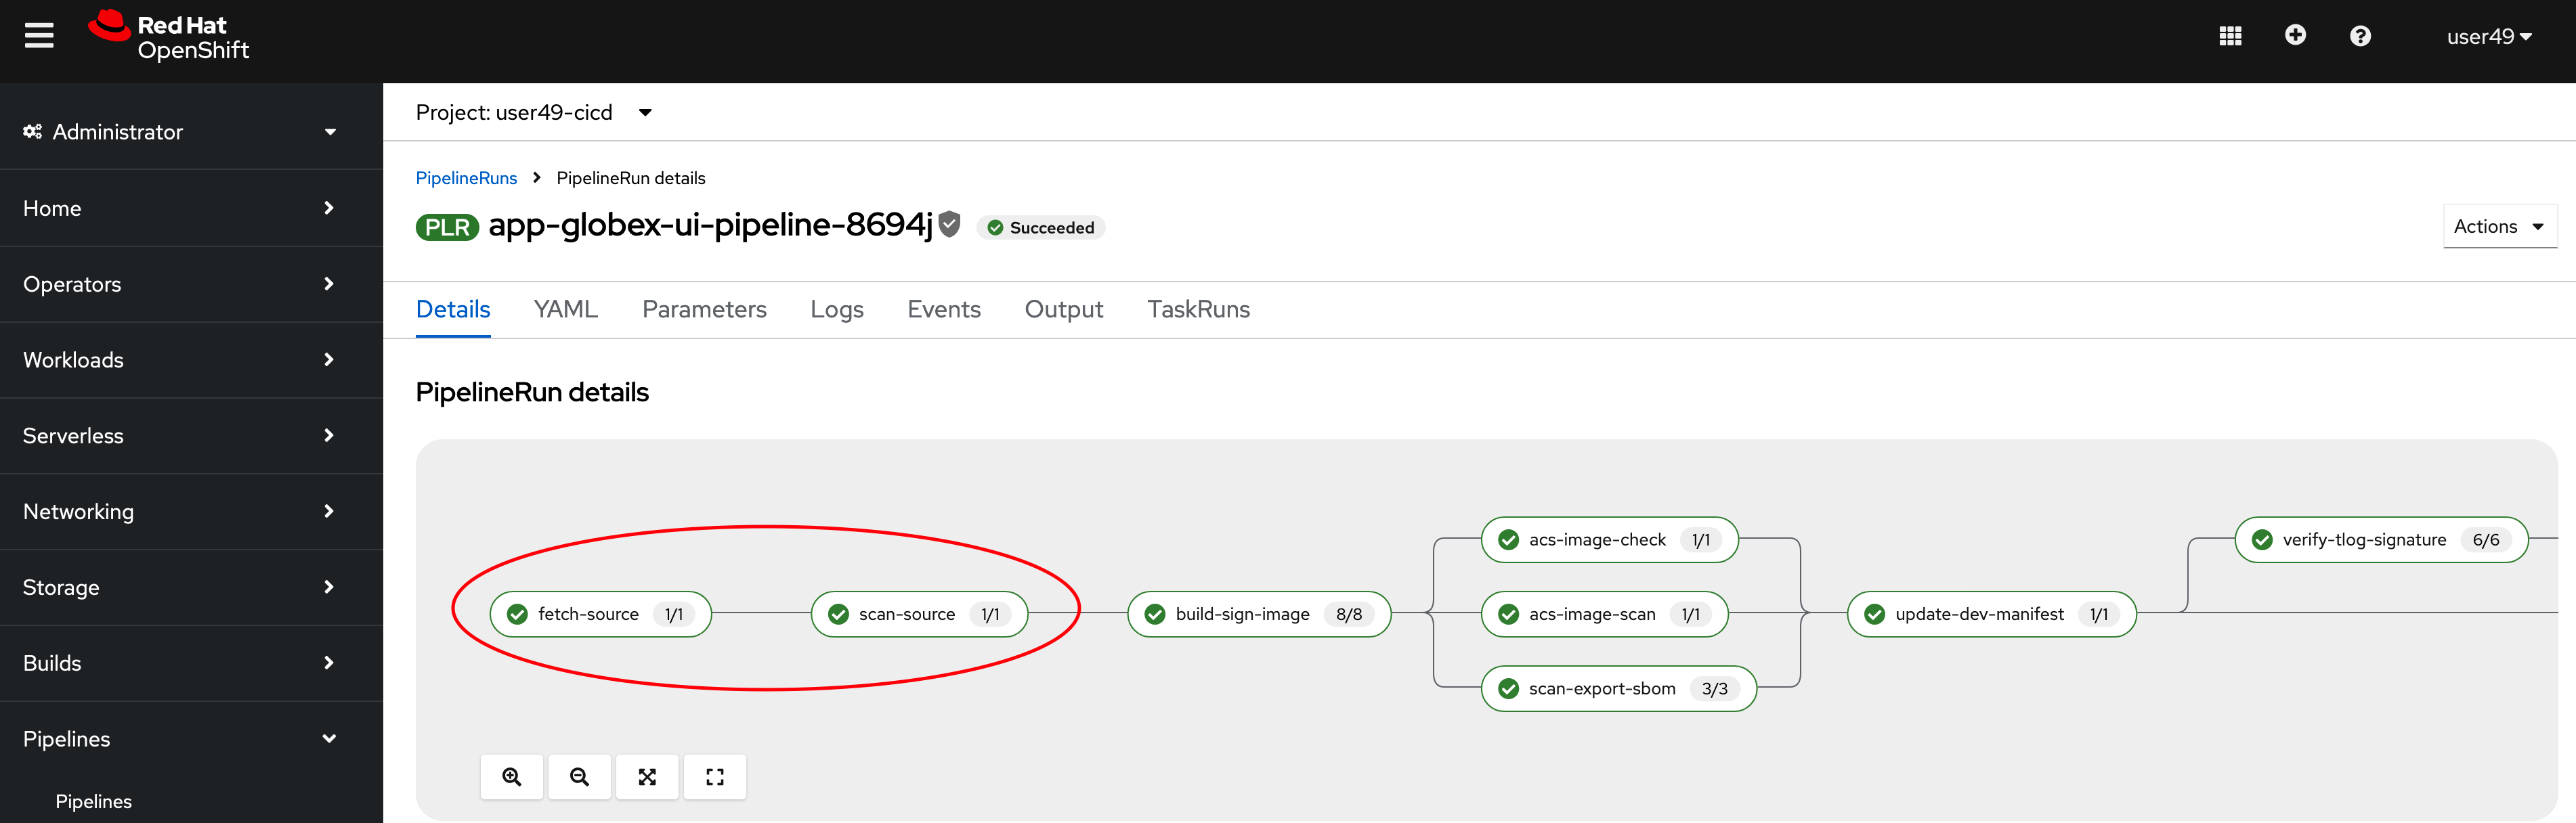
In the early stages of the pipeline, we do a traditional source clone, then we verify the code using SonarQube.
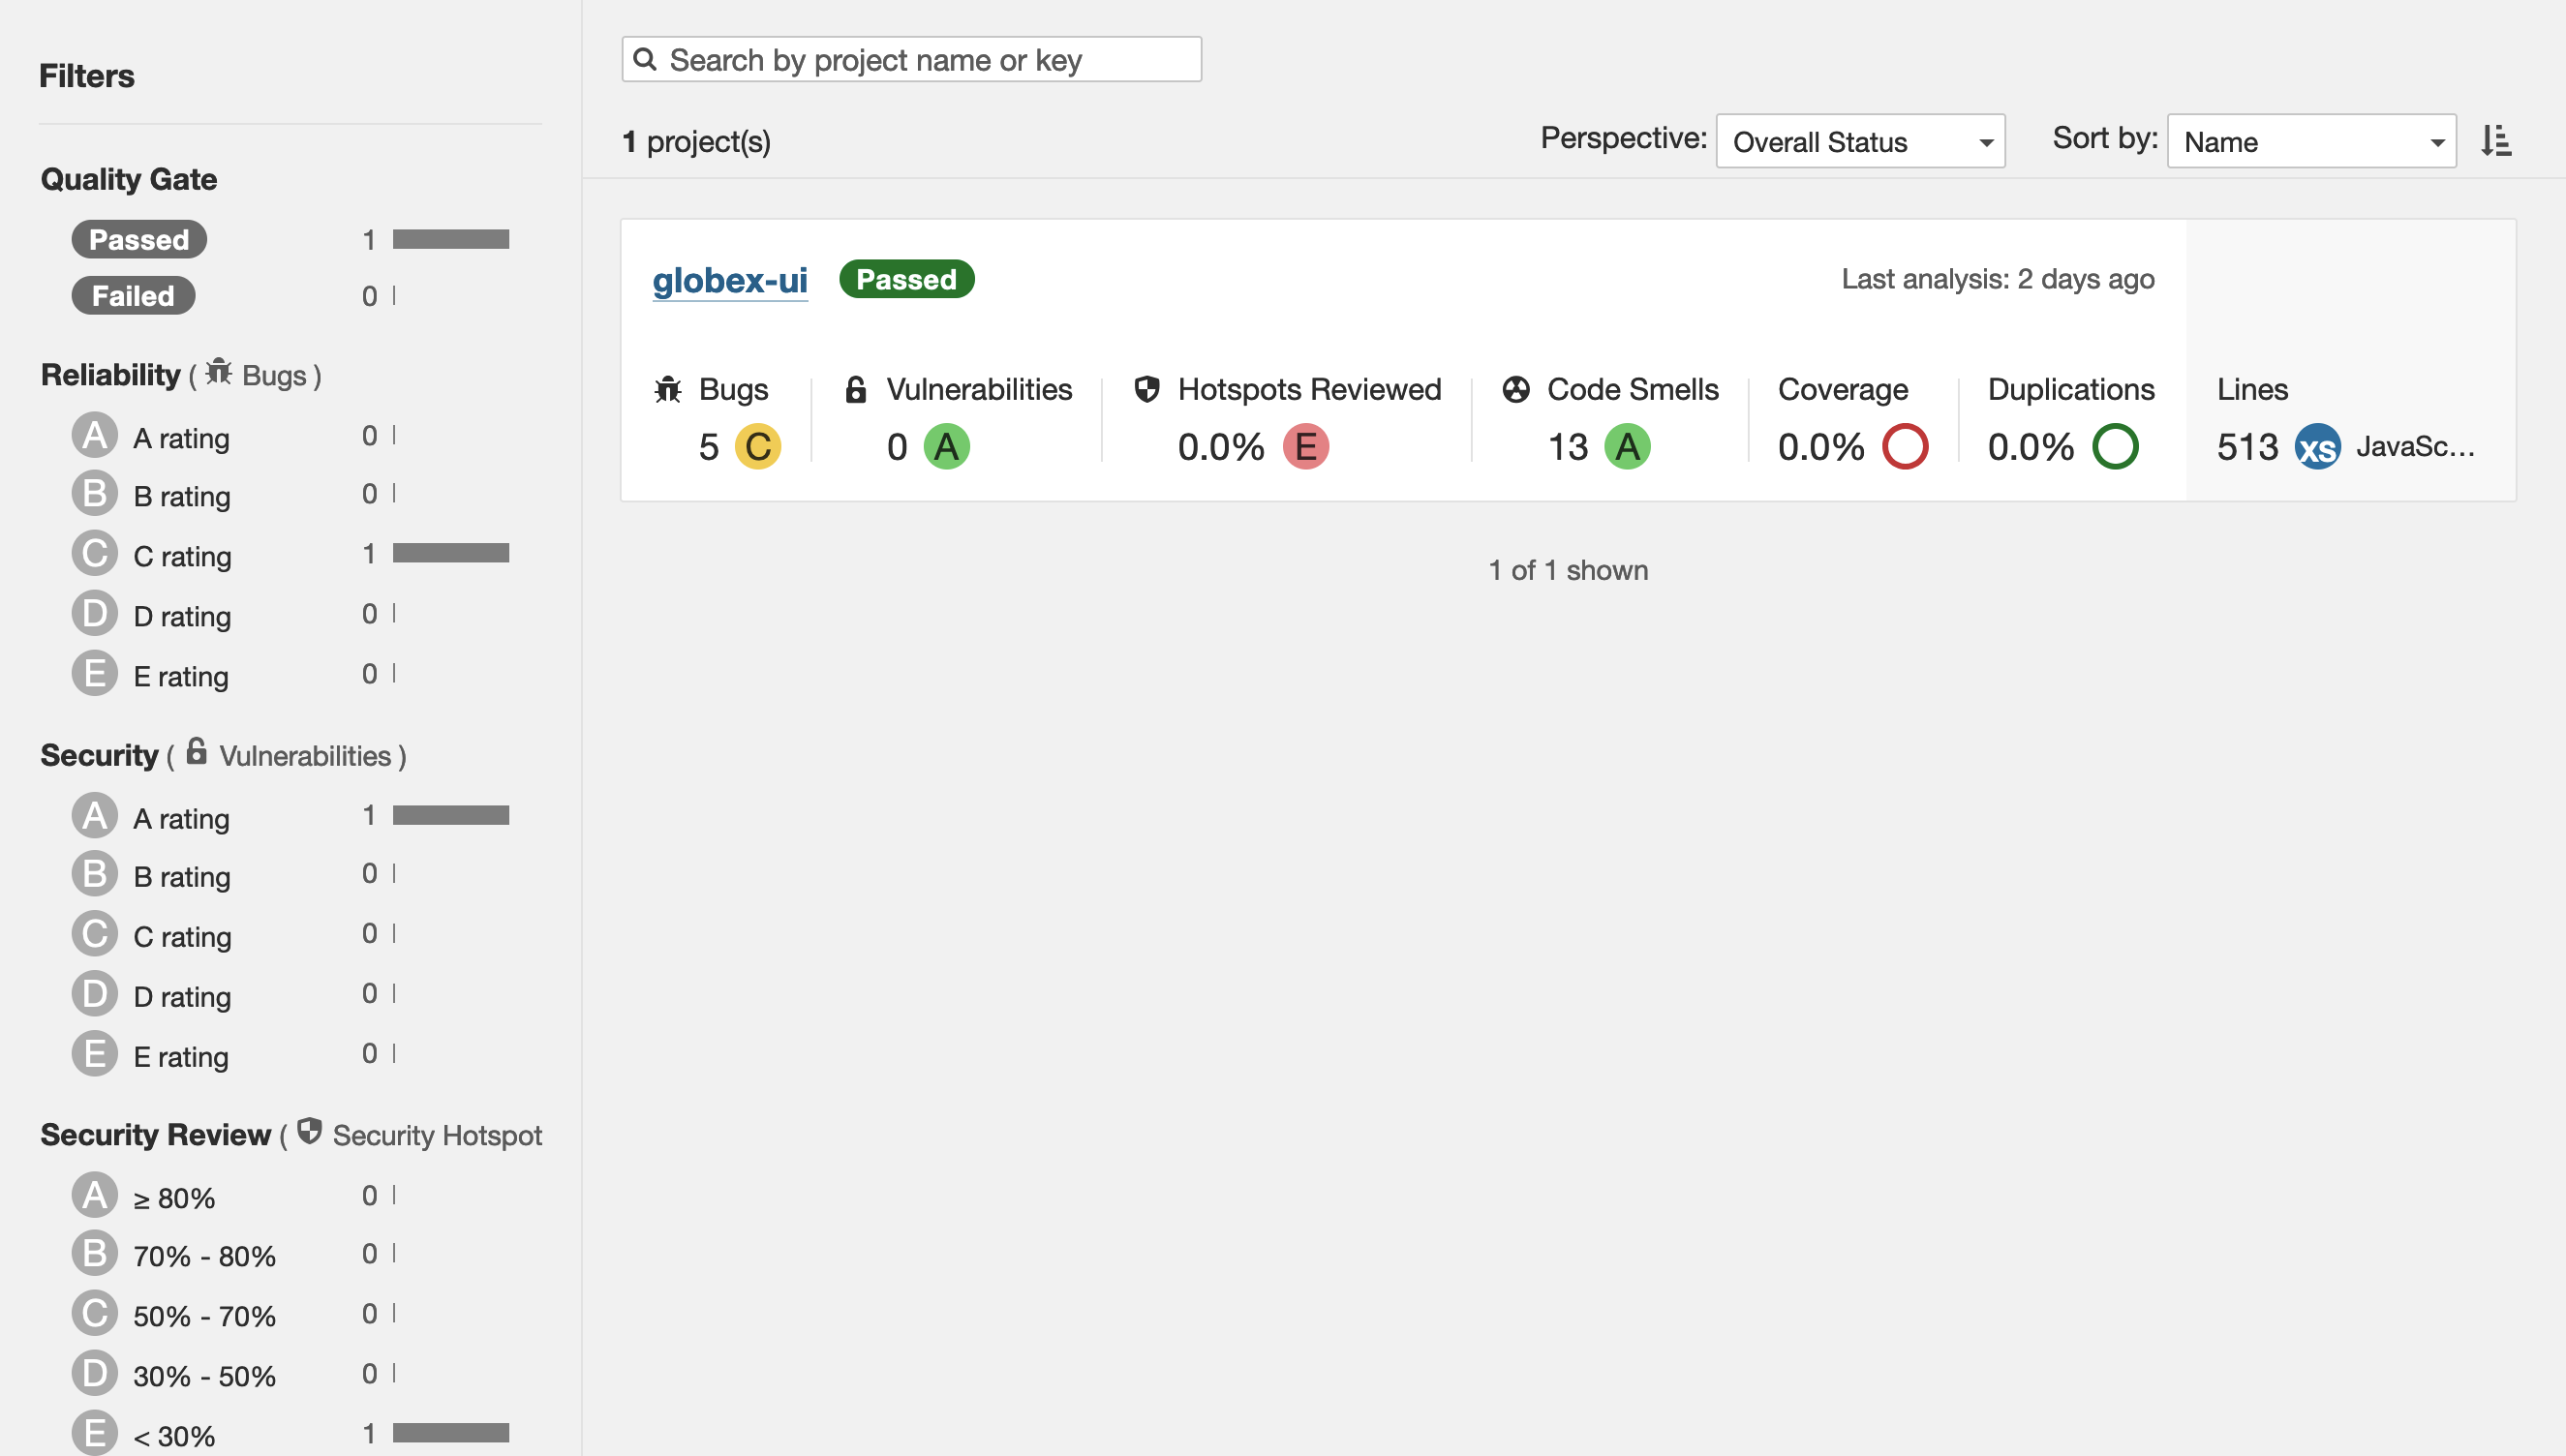
You can access your SonarQube instance to check the project using this URL below. If it’s unresponsive just wait a bit longer and refresh, because sonarqube needs the projects to be created first: https://sonarqube-{user}-cicd.{openshift_cluster_ingress_domain}/projects
-
You should be able to see your project
-
Go back to the pipelineRun view in OpenShift. Now, in the next stages, this is where we have implemented additional security layers that will be detailed below.

Build-sign-image. Enhancing Security with Tekton Chains
This task is responsible for building a container image based from our source code, including any changes that were committed. The built container image, along with a new tag and a generated Software Bill of Materials (SBOM) is then pushed to our private quay registry on successful completion. An SBOM is a machine-readable, formally structured complete list of all the components, including modules and libraries, used/required to build a software solution. So, in simple words, a software bill of materials offers an insight into the makeup of an application developed using third-party commercial tools and open-source software.
This task also uses Tekton Chains, a Kubernetes Custom Resource Definition (CRD) controller, that is crucial in augmenting the supply chain security within our OpenShift Pipelines. This tool’s capacity to automatically sign task runs, and its adoption of advanced attestation formats like in-toto, bring a higher degree of trust and verification to our processes.
This task is responsible for emitting two important TaskResults i.e. IMAGE_URL and IMAGE_DIGEST. Those parameters are very important because they are the ones that trigger Tekton Chains to create a digital signature for your container image.
Now let’s have a look at the following tasks:
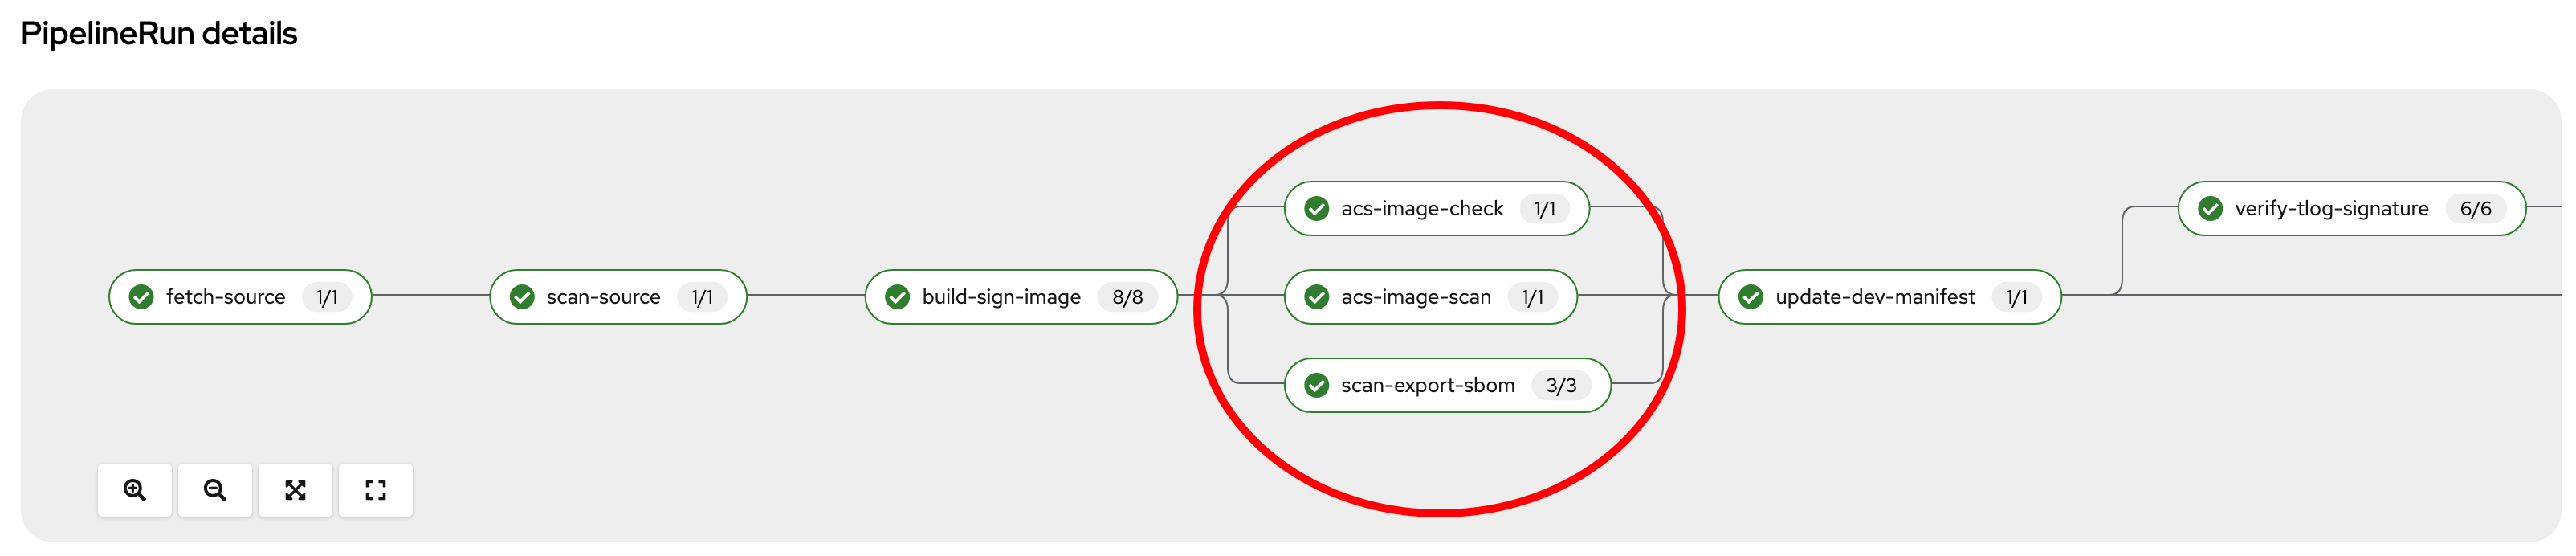
acs-image-check. This task uses the roxctl CLI to check build-time violations of your security policies in your image. In this demo, we have set up a policy that verifies signatures on your container image. If this policy is enabled and your container image is unsigned or signed by non trusted source, the pipeline will fail. If the signature is available and is trusted, this pipeline task will complete successfully.
acs-image-scan. The acs-image-scan uses the roxctl CLI to return the components and vulnerabilities found in the image. Any vulnerabilities that exist in packages embedded in the image will be reported.
scan-export-sbom. This task is responsible for scanning any vulnerabilities that exist in our SBOM and exports our SBOM to a externally accessible repository. For scanning, this task uses a 3rd-party tool called Grype which is a vulnerability scanner for container images and filesystems.
That’s it! You now have a deeper understanding of the Security capabilities that provide a Trusted Software Supply Chain (or DevSecOps approach), using OpenShift Pipelines (tekton chains), and Red Hat Advanced Cluster Security (Red Hat ACS).
While this workshop is using OpenShift Pipelines for Continuous Integration (CI), any CI tool such as GitHub Actions, GitLab, Jenkins, etc is easily capable of integrating with the Red Hat technologies providing these capabilities. In fact if you run an oc get task <task-name> -o yaml -n {user}-cicd you will see that the task is simply running a bash script.
|
Trusted Image Registry
Red Hat Quay is a trusted, geo-replicated, security enabled container registry that allows to scan container image for vulnerabilities, but also store the signed images with all their metadata, such as the generated SBOM files and the signatures. These assets can be used later on in the pipelines for verification and validation purposes, like we have seen in the previous pipeline.
Let’s now have a look at container image in Quay, and verify that it has indeed been signed by the pipeline.
-
In a new tab, Open the Quay URL: https://registry-quay-quay-operator.{openshift_cluster_ingress_domain}
-
Select "Sign in with Keycloak" and login as user "{user}" and password {password}.
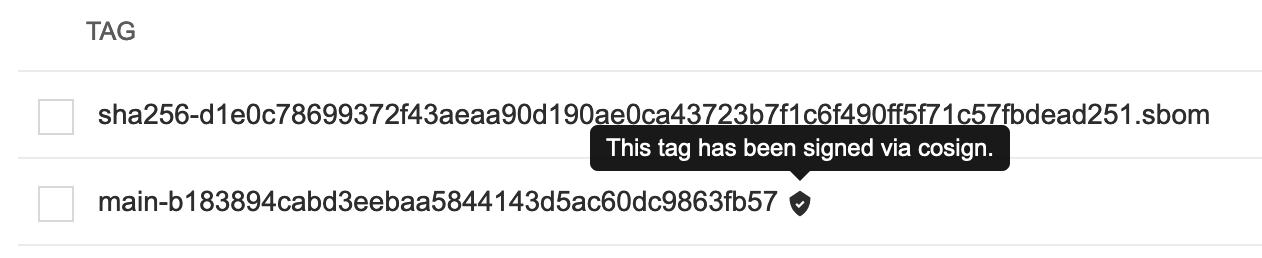
Next, click the "workshop{usernum}/globex-ui" repository, and click on 'Tags' on the left side menu.
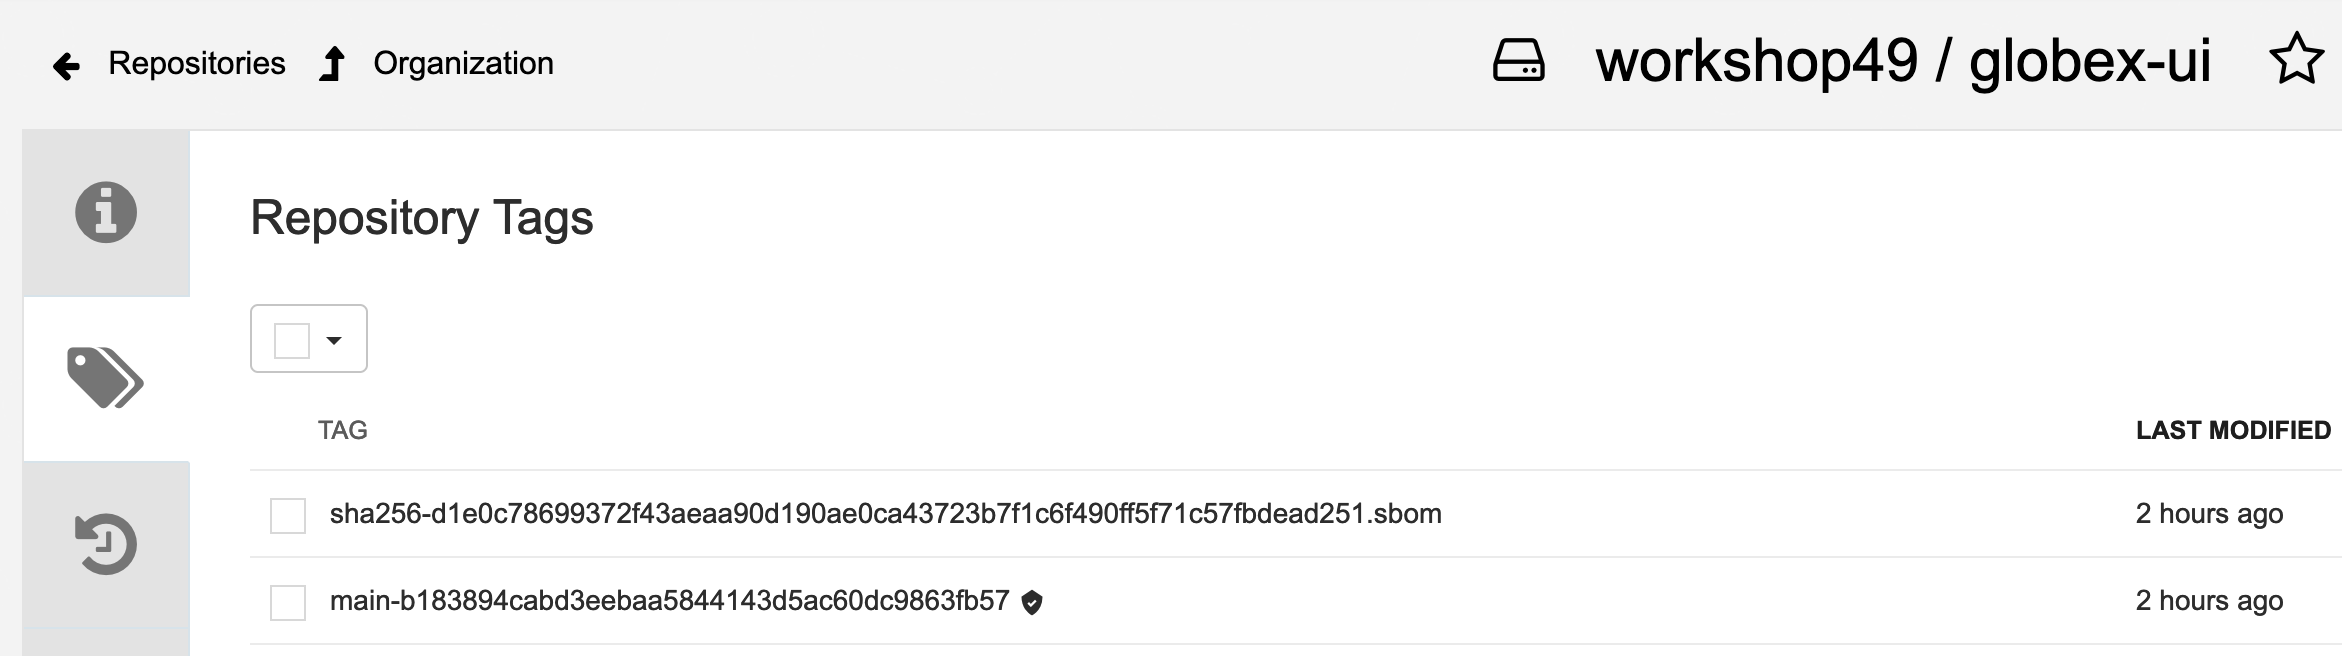
We can now see all the history of that container image, with all tags, and the associated metadata. We can particularly see that this container image has a small checkmark next to it, hover it to check that it has been correctly signed by Tekton Chains with the DevSecOps pipeline was last run.
You can also click on the "Show signatures" button on the top-right side to reveal additional information about the image.
Quay also provides a summary of the vulnerabilities of the container image, but will save that for when we review Red Hat Advanced Cluster Security so let’s skip to the next section.
That’s it, you now have a better understanding of Quay capabilities to store the signed container images, along with the metadata such as SBOMs, signatures etc.
Validating Signatures
Manual Verification
We can validate the image signature with the sigstore utility called cosign. This validation can be performed in variety of ways, first let’s validate the signature manually using the public signature.
While cosign signature used to sign the image by Tekton Chains is stored in the openshift-pipelines namespace, a copy of the signature is available in the {user}-cicd namespace to support validation in the pipeline.
To view the signature run the following:
oc get secret cosign-secret -o yaml -n {user}-cicd | oc neatYou will then see the following:
apiVersion: v1
data:
  cosign.key: LS0tLS1CRUdJTiBFTkNSWVBURUQgQ09TSUdOIFBSSVZBVEUgS0VZLS0tLS0KZXlKclpHWWlPbnNpYm1GdFpTSTZJbk5qY25sd2RDSXNJbkJoY21GdGN5STZleUpPSWpvek1qYzJPQ3dpY2lJNgpPQ3dpY0NJNk1YMHNJbk5oYkhRaU9pSllkVkY0VG5wd01TODNUSEJxYkdkM1NIUk5WMlpMUjBsQlMyRmpWUzlaCk5IbG9SVnBVTW5BdmRFbFJQU0o5TENKamFYQm9aWElpT25zaWJtRnRaU0k2SW01aFkyd3ZjMlZqY21WMFltOTQKSWl3aWJtOXVZMlVpT2lKWksweFlPU3RqVTIwNWFHODFOREEyV1ROVU4zUXhkM1p5UTJoaGN6Z3hUaUo5TENKagphWEJvWlhKMFpYaDBJam9pYnk5a1FrNDFUelJ1TkZkSGNHeFJTVk5qZUZGeWVsUXdjbmsxSzA5VFlWTk9lbmRsCmNVUlFTelJUVHpoVlRXaFlaVEZOWlZRNFlWWkhLMnAySzNwdlJIZGxWa05FTkU5UmREbElkMlJISzFoRVVGQnQKVUV0WWJqRXJjME5hYURGWGMwSjVWMjExTVU4d01FbG5UR2xJVnpRM1NFUkpLMmhJVFdVMlZEUnRUMGRLU1VrcgpiRVkyY201QmREWmlVMFV4TDFKSmFFWjJkVWR6UW14T1F6Wlpka0kzWWtKaU56TTBWRnA2YTFsSEt6bG9RMmQ2ClFUWjNOVzFrYlVjMmIzSlFWeXRHVjJWNE1GRndPVUZXVVdjOVBTSjkKLS0tLS1FTkQgRU5DUllQVEVEIENPU0lHTiBQUklWQVRFIEtFWS0tLS0tCg==
  cosign.password: UkBkaGF0MTIzNA==
  cosign.pub: LS0tLS1CRUdJTiBQVUJMSUMgS0VZLS0tLS0KTUZrd0V3WUhLb1pJemowQ0FRWUlLb1pJemowREFRY0RRZ0FFaldubzZJdXBQRlNSaTlidE5oRnRNZVMxaVFiTQpnTjZPV3NmVWRoZlQ1VENmMjNFU0UzdmZ1TVd0WDlzeXZqbWVtdUdwWisvZlJET3lxQWJWbkFHTnBRPT0KLS0tLS1FTkQgUFVCTElDIEtFWS0tLS0tCg==
immutable: true
kind: Secret
metadata:
  name: cosign-secret
type: Opaque
Notice there are three keys in the secret. cosign.key is the private key used to sign the image, cosign.pub is the public key used to validate the image and cosign.password is key for the password. All values
are base64 encoded as per standard Kubernetes practices.
| To validate the image only the public key is required, we have included a copy of the full secret for illustrative purposes. It is highly recommended to restrict access to the private key and password in normal situations. |
To get a local copy of the the public key we will use to validate the image execute the following:
oc get secret cosign-secret -o jsonpath="{.data['cosign\.pub']}" -n {user}-cicd | base64 -d > ~/cosign.pubNext verify that you retrieved the public key by viewing the file:
cat ~/cosign.pub-----BEGIN PUBLIC KEY-----
MFkwEwYHKoZIzj0CAQYIKoZIzj0DAQcDQgAEjWno6IupPFSRi9btNhFtMeS1iQbM
gN6OWsfUdhfT5TCf23ESE3vfuMWtX9syvjmemuGpZ+/fRDOyqAbVnAGNpQ==
-----END PUBLIC KEY-----Finally use the cosign command to verify the image in the Quay image registry:
cosign verify --insecure-ignore-tlog=true --key ~/cosign.pub registry-quay-quay-operator.{subdomain}/workshop{usernum}/globex-ui:main-b183894cabd3eebaa5844143d5ac60dc9863fb57
The switch --insecure-ignore-tlog=true is added so that cosign bypasses checking the public transparency log. Tekton Chains is configured to use the transparency log deployed on the workshop cluster rather then the public instance, as a result the signature is never uploaded to the public transparency log that cosign uses by default. Without this switch the verification will fail
|
WARNING: Skipping tlog verification is an insecure practice that lacks of transparency and auditability verification for the signature.

Verification for registry-quay-quay-operator.{subdomain}/workshop{usernum}/globex-ui:main-b183894cabd3eebaa5844143d5ac60dc9863fb57 --
The following checks were performed on each of these signatures:
  - The cosign claims were validated
  - The signatures were verified against the specified public key

[{"critical":{"identity":{"docker-reference":"registry-quay-quay-operator.{subdomain}/workshop{usernum}/globex-ui"},"image":{"docker-manifest-digest":"sha256:137f2141572bb833987dc04b58f4114d09e7a5d97d55b78ec8d064252d3f1020"},"type":"cosign container image signature"},"optional":null}]
The critical shown in the output json at the end is highlighting the critical information, it is not indicating an error.
|
Verifying With a Transparency Log
Red Hat Trusted Artifact Signer (RHTAS) provides a suite of tools to support image signing. These tools are primarily sourced from the upstream Sigstore project and include the following:
-
Certificate Transparency Log: A certificate transparency log is a permanent and immutable ledger or record-keeping system for signing events that is immune to change and remains inaccessible to the public. The log can be queried for making informed decisions on the integrity and authenticity of an artifact, verification of a particular entry, or retrieval of entries.
-
Certificate Authority: A certificate authority is a free root certification authority that issues short-lived, temporary certificates to an authorized identity and publishes them in a transparency log. It provides the option to use existing self-managed keys maintained in a third-party key management system.
-
Sigstore Clients: Command line utilities like
cosignthat we used earlier as well as other tools for generating and verifying digital signatures of source code, artifacts, software bills of materials, and container images.
In this workshop RHTAS has been deployed in the cluster and Tekton Chains has been configured to automatically upload the metadata needed to verify the signature in the transparency log.
The first step is to set some environment variables so cosign will use the transparency log for verification:
export TUF_URL=https://tuf-trusted-artifact-signer.{subdomain}
export COSIGN_FULCIO_URL=https://fulcio-server-trusted-artifact-signer.{subdomain}
export COSIGN_REKOR_URL=https://rekor-server-trusted-artifact-signer.{subdomain}
export COSIGN_MIRROR=$TUF_URL
export COSIGN_ROOT=$TUF_URL/root.json
export COSIGN_YES="true"
export SIGSTORE_FULCIO_URL=$COSIGN_FULCIO_URL
export SIGSTORE_REKOR_URL=$COSIGN_REKOR_URL
export REKOR_REKOR_SERVER=$COSIGN_REKOR_URL
Next we will initialize and configure cosign as well as retrieve certificates from the various Sigstore components required for verification with the transparency log:
cosign initializeFinally perform the actual verification by executing the following command:
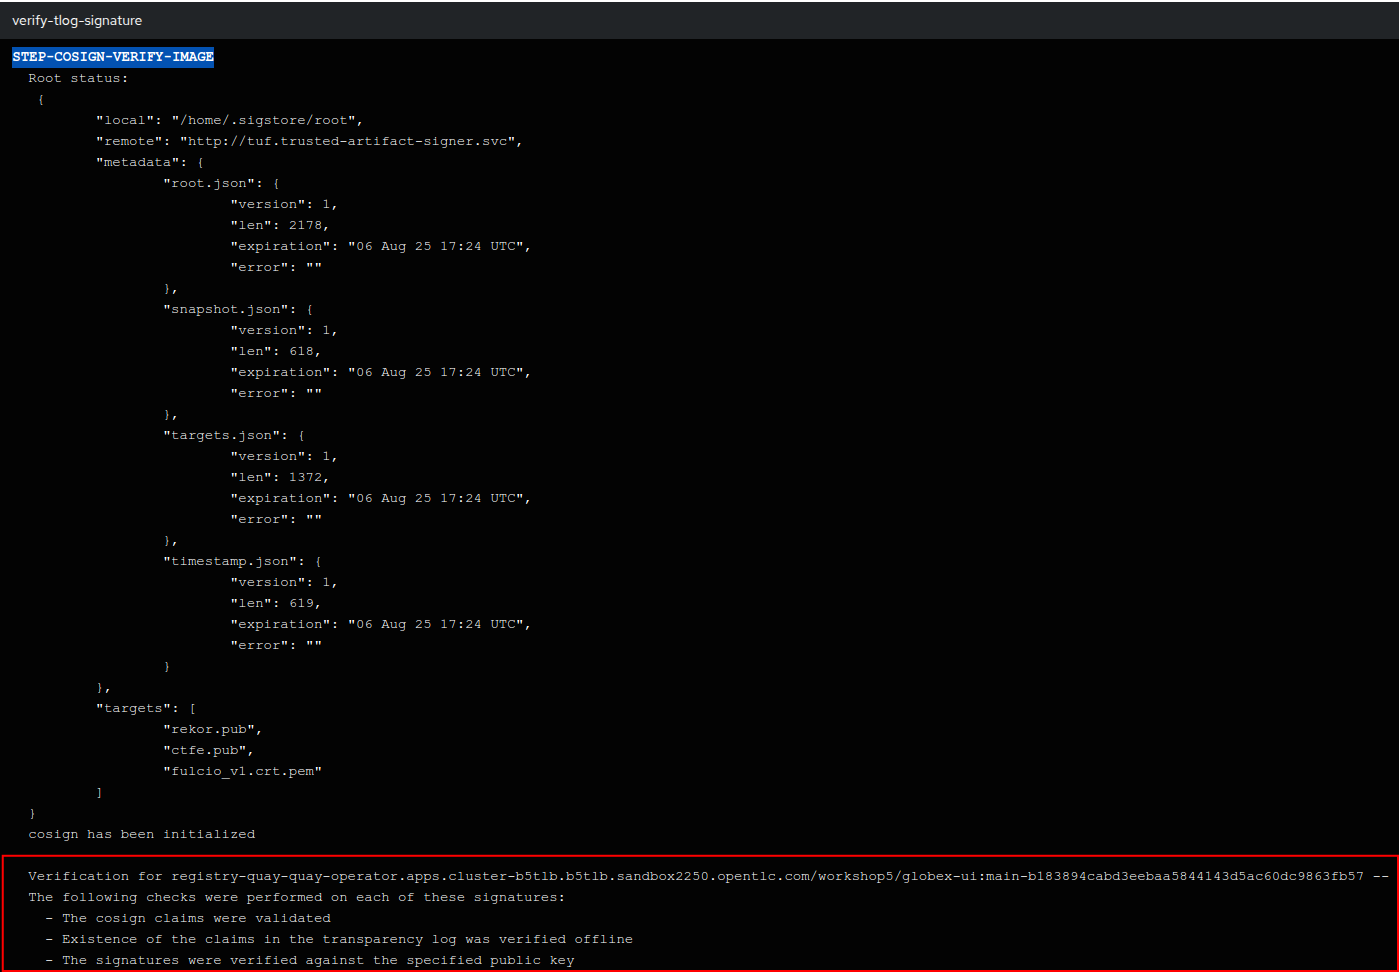
cosign verify --key ~/cosign.pub registry-quay-quay-operator.{subdomain}/workshop{usernum}/globex-ui:main-b183894cabd3eebaa5844143d5ac60dc9863fb57Verification for registry-quay-quay-operator.apps.{subdomain}/workshop{usernum}/globex-ui:main-b183894cabd3eebaa5844143d5ac60dc9863fb57 --
The following checks were performed on each of these signatures:
- The cosign claims were validated
- Existence of the claims in the transparency log was verified offline
- The signatures were verified against the specified public key
[{"critical":{"identity":{"docker-reference":"registry-quay-quay-operator.{subdomain}/workshop{usernum}/globex-ui"},"image":{"docker-manifest-digest":"sha256:137f2141572bb833987dc04b58f4114d09e7a5d97d55b78ec8d064252d3f1020"},"type":"cosign container image signature"},"optional":null}]Notice that in this iteration the existence of the signature in the transparency log was verified which was not done previously.
Verifying Signatures in Pipeline
While manual verification is useful, ideally we want to bake this process into the Pipeline itself. This is done in the verify-tlog-signature step of the pipeline:

Click on the verify-tlog-signature task, note that an identical verification to what was performed manually has been completed:
This verification is performed every time the image is built, however in a later section we will look at how we can inform and enforce a signature requirement through a Policy. However before we do that, now that we have built the image and verified its signature, let’s deploy the front-end application.
Deploying Web Application
Using overlays and Kustomize in the DevSecOps pipeline
A common pattern when deploying an application to multiple environments is to have a a repository that contains the following structure:
-
base: the common assets that we want to deploy
-
overlays:
-
dev: specific values that will override the ones in the base for the "dev" environment
-
prod: specific values that will override the ones in the base for the "prod" environment
-
Let’s deploy these applications using an ApplicationSet as we did previously but this time we will use a git generator.
sed 's/$USER/{user}/' ~/workshop/content/modules/ROOT/examples/web-nodejs-appset.yaml | sed 's/$SUBDOMAIN/{subdomain}/' | oc apply -f - -n {user}-argocdLet’s have a quick look at our new ApplicationSet:
oc get appset web-nodejs -o yaml -n {user}-argocd | oc neatapiVersion: argoproj.io/v1alpha1
kind: ApplicationSet
metadata:
name: web-nodejs
namespace: {user}-argocd
finalizers:
- resources-finalizer.argocd.argoproj.io (1)
spec:
generators:
- git: (1)
directories:
- path: globex/overlays/* (2)
repoURL: https://gitea-gitea.{subdomain}/{user}/gitops.git (3)
revision: HEAD
values:
user: {user} (4)
goTemplate: true
goTemplateOptions:
- missingkey=error
template:
metadata:
name: app-{{.path.basename}} (5)
namespace: '{{ .values.user }}-argocd'
spec:
destination:
name: in-cluster
namespace: '{{ .values.user }}-{{.path.basename}}'
project: '{{ .values.user }}'
source:
kustomize:
patches:
- patch: |-
- op: replace
path: /spec/template/spec/containers/0/env/0/value
value: 'gateway-vertx-{{ .values.user }}-{{.path.basename}}'
target:
kind: Deployment
name: web-nodejs
path: '{{.path.path}}' (6)
repoURL: https://gitea-gitea.{subdomain}/{user}/gitops.git
targetRevision: main
syncPolicy:
automated:
prune: true| 1 | We are using the git generator to create an Application for every directory in the target repository and path |
| 2 | The target path, each sub-directory in this path will be used to create an application. In our case the dev and prod overlays |
| 3 | The target repository |
| 4 | Additional values to pass to the template |
| 5 | The basename of the path for which the Application is being generated, either dev or prod in this case |
| 6 | the full path in the repo for the current directory |
Check that the Applications have been created:
oc get apps -n {user}-argocdapp-dev Synced Healthy
app-prod Synced Progressing
coolstore-app-dev Synced Healthy
coolstore-app-prod Synced Healthy
dev-tools Synced Healthy
pipeline-helm Synced Healthy
The app-prod application may be Progressing for awhile or show as Degraded, this is because we have not yet deployed the updated
image generated by the Pipeline in production. We will perform this step in the next section.
|
We can verify that the applications have been created in the Shared OpenShift GitOps by checking the Application tiles.
-
Go to OpenShift GitOps and select the "app-dev" application in the main page to access the details.
-
On the top-left side, click on "App details" to access the information about the application, such as the git repository, the branch where the files are located, the target cluster and namespace where the application is deployed, etc.
If we pay closer attention, there are 3 items worth mentioning to understand the multi-environment management:
-
REPO_URL: the git repository where our the resources we want to deploy are defined
-
TARGET REVISION: the branch to use
-
PATH: the folder that contains the specific values for that environment. Here for example, for the "DEV" environment, we use the file located in "globex/overlays/dev".
You can see more details by opening the "gitops" repository in gitea, and navigating to "globex" folder.

Adopting a GitOps approach for deployments across multiple namespaces
As mentioned in the application architecture section, our "Globex" application would be deployed across multiple namespaces or clusters using OpenShift GitOps.
Let’s explore this step in the pipeline, then have a look at argocd to understand how it uses the manifests to target the desired namespace.
-
On the OpenShift console, on the left menu, Select Pipelines → Pipelines, and select the pipelineRun with the "Succeeded" status (the same one as in the previous section).
-
update-dev-manifest: This task is responsible for updating the manifests in the git repository, by updating the container image reference in the deployment yaml file, using Kustomize. This is a common approach when using tools like OpenShift GitOps. Let’s have a look at the yaml file in Gitea.
-
Open Gitea’s URL: https://gitea-gitea.{openshift_cluster_ingress_domain}
-
Login using the provided credentials: username: {user}, password: openshift.
-
Click on the last commit id, as shown in the screenshot below:

-
Take a look at the changes about the container image tag, as seen below. Because OpenShift GitOps is constantly monitoring that GitOps repository, any update to the yaml file triggers a reconciliation with the target DEV environment, namely the {user}-dev namespace, where the application get re-deployed.

Let’s now switch to OpenShift GitOps to see how the application gets deployed in the DEV namespace.
-
Open the OpenShift GitOps URL: https://argocd-server-gitops.{openshift_cluster_ingress_domain}
-
Select Login via Keycloak, and login as user "{user}" with password openshift
-
OpenShift GitOps uses a concept of an "Application" as a group of manifests stored in a git repository that need to be deployed altogether.
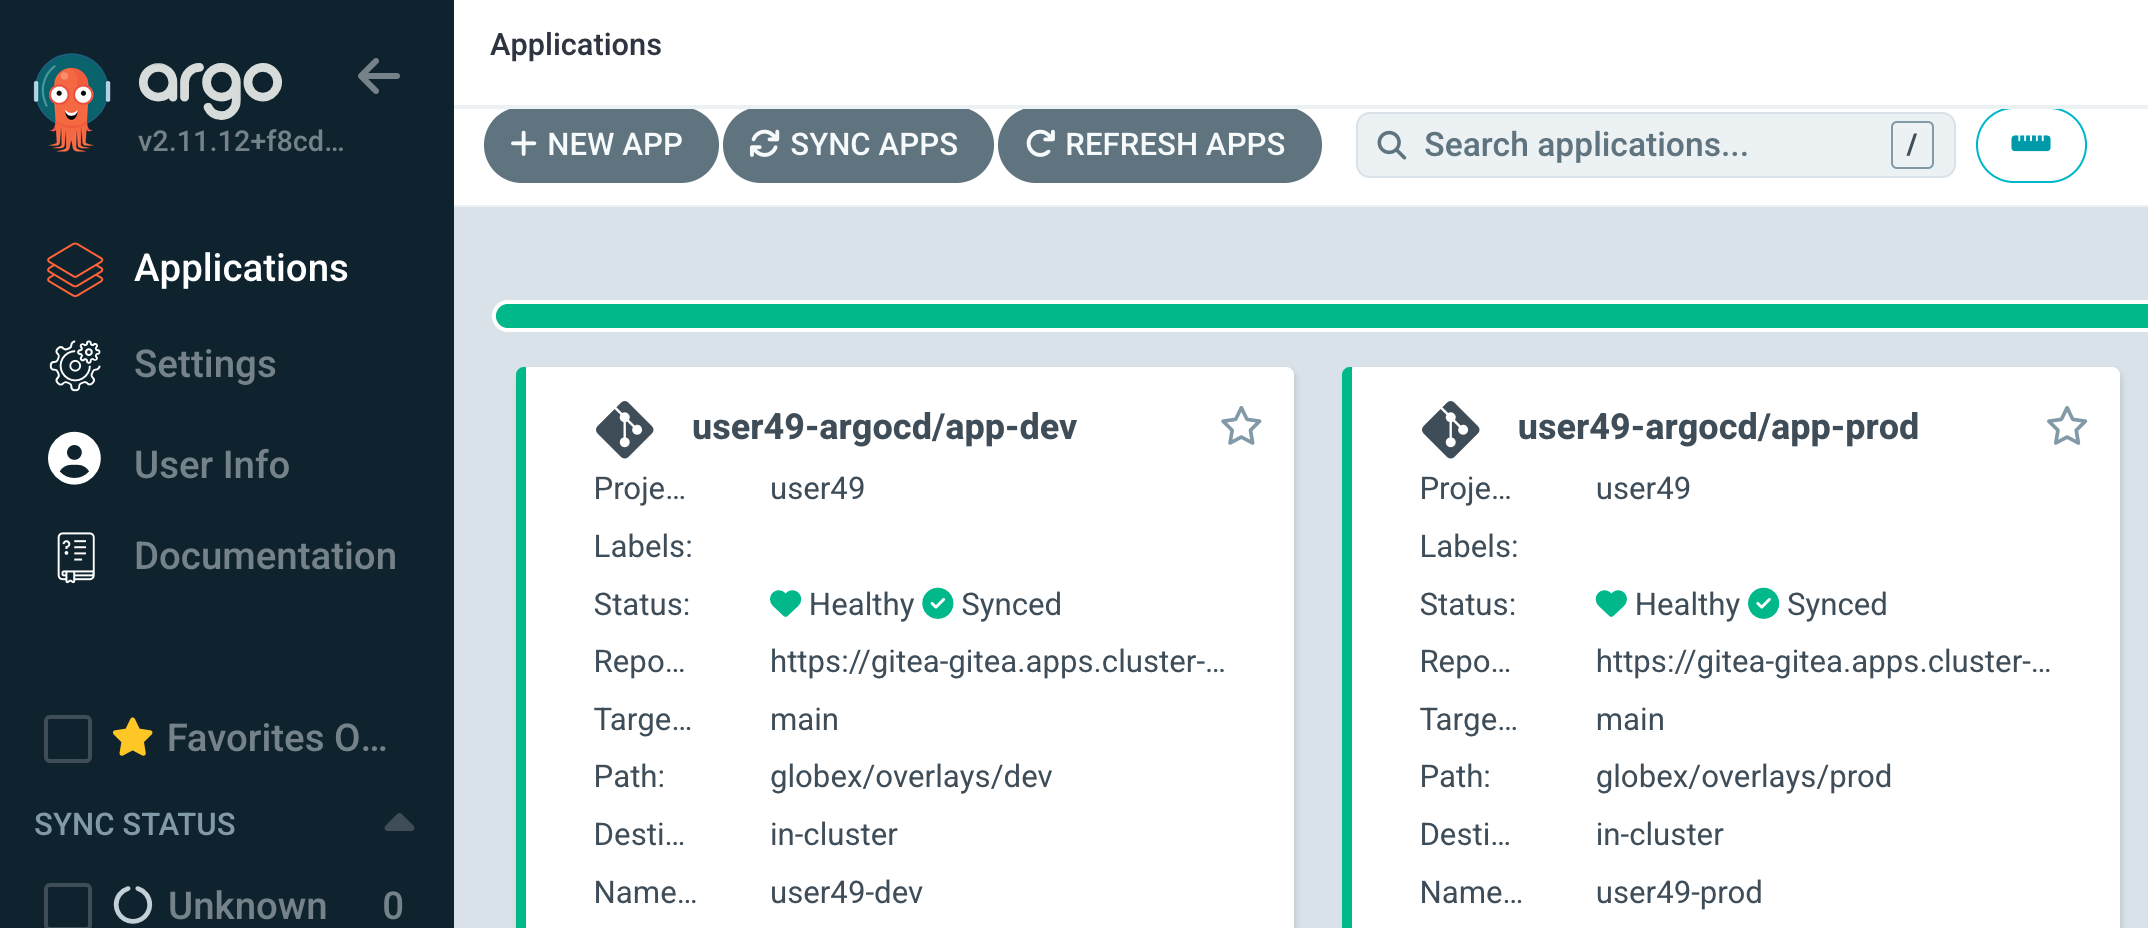
Notice that the app-dev and app-prod Applications are targeted to different namespaces, {user}-dev and {user}-prod. They could just as easily be targeted to different clusters as well since it is common in many organizations to have separate clusters for non-production versus production.
Deploying to production using a Pull Request in Gitea
We have deployed the same application to the "PROD" environment using the app-prod Application in OpenShift GitOps. The main difference is that the prod version is using "globex/overlays/prod" for the specific values required for production.
It is common to have a "manual approval", i.e. "gating", for deploying into a production environment, and in our case, we’ll be using a Pull Request to approve the change to the PROD manifests located in "globex/overlays/prod".
The pipeline execution has already created the pull request in the last steps, so let’s review it in gitea and merge it to initiate the deployment in the "{user}-prod" namespace through GitOps.
-
Open Gitea, select the gitops repository and click on Pull Requests as seen below:
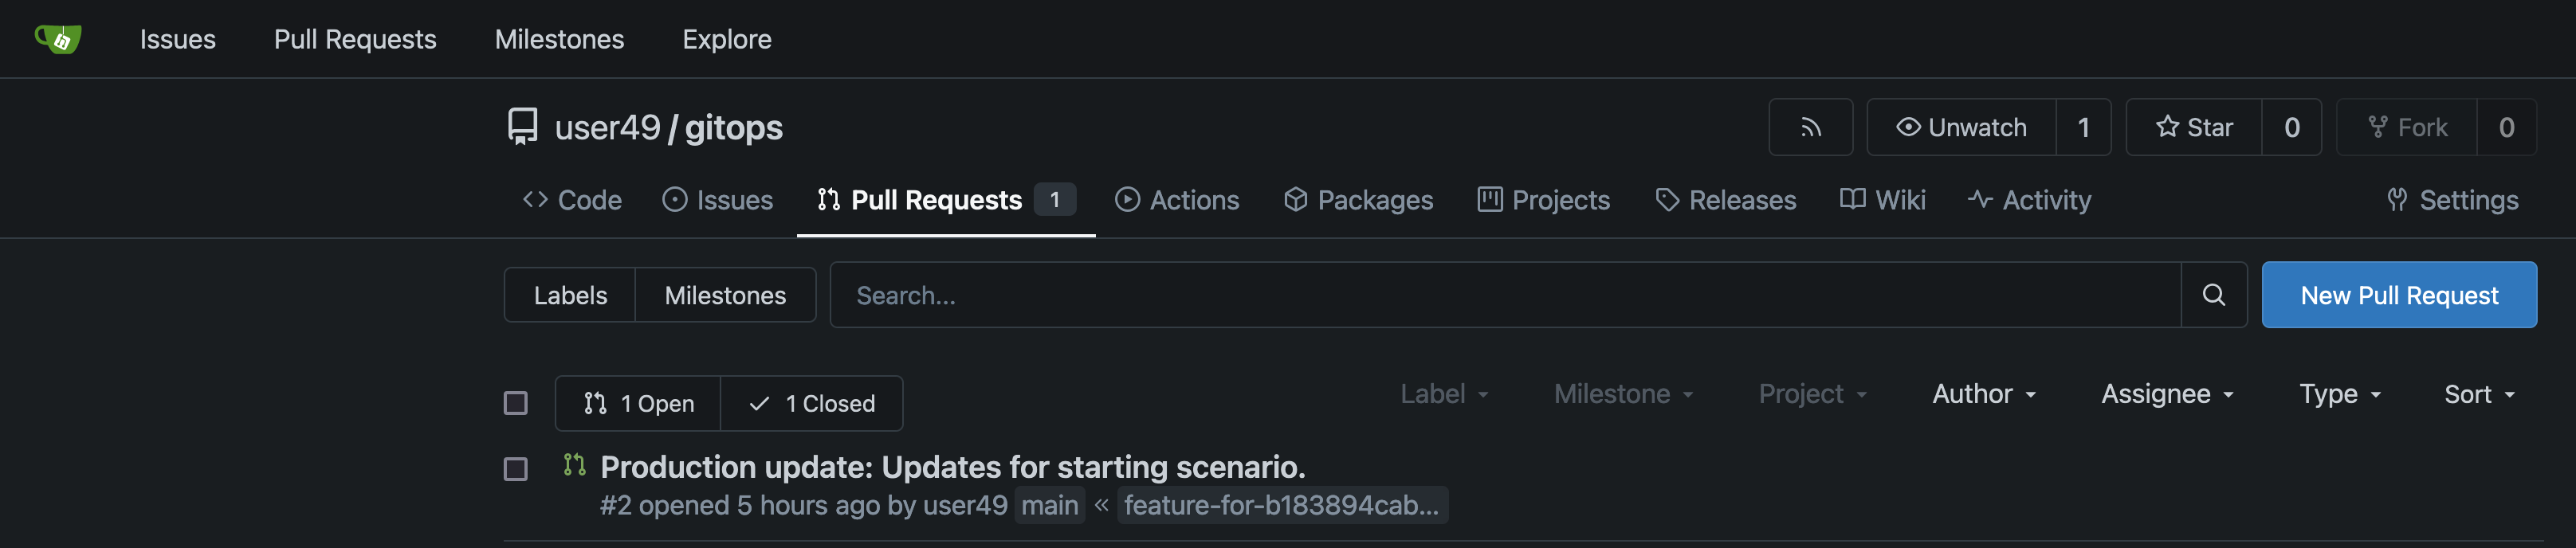
Click on the pull request and then click on Create Merge Commit, and select create commit:

-
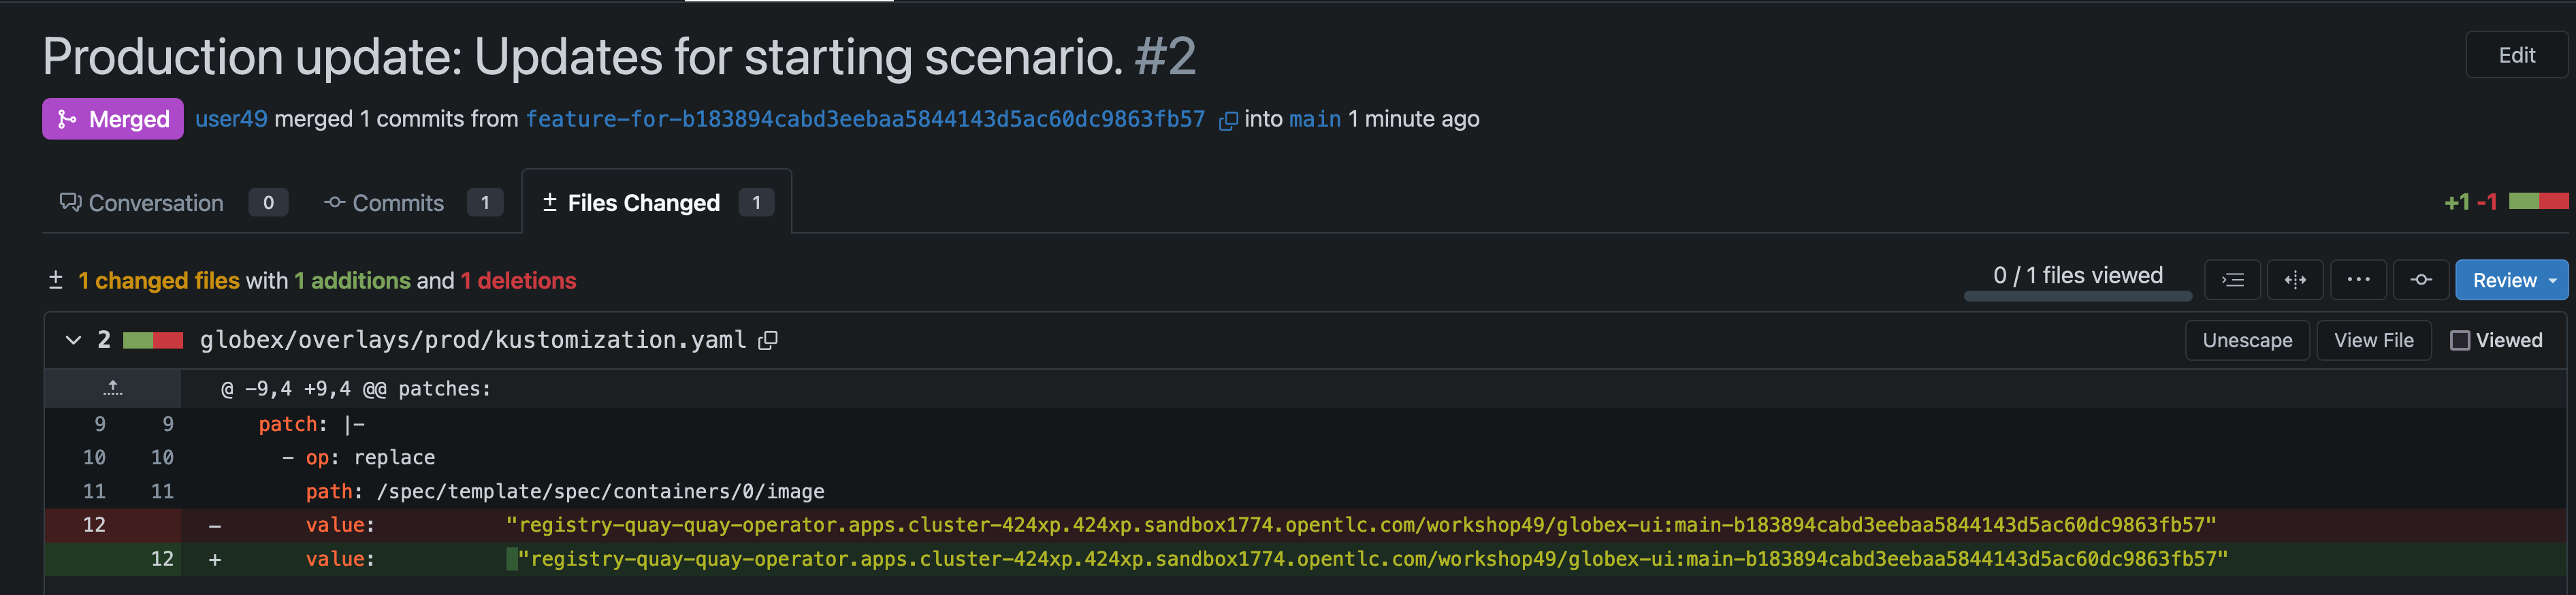
In the Pull Request details, click on Files Changed, and you should see that we have updated the image reference for the prod environment, as seen below:
-
Close the application details window, and explore the application page to see all the kubernetes resources that are deployed by OpenShift GitOps to the target cluster / namespace, such as the deployments, the services, etc.
It may take a couple of minutes for Argo CD to pick up the change, you can accelerate the process by clicking the Refresh button in the Shared instance for the app-prod Application.
|
-
Let’s see the same resources deployed in the application namespace {user}-prod with this URL: {openshift_console_url}/topology/ns/{user}-prod?view=graph
-
Let’s open the application to verify that it is running as expected:
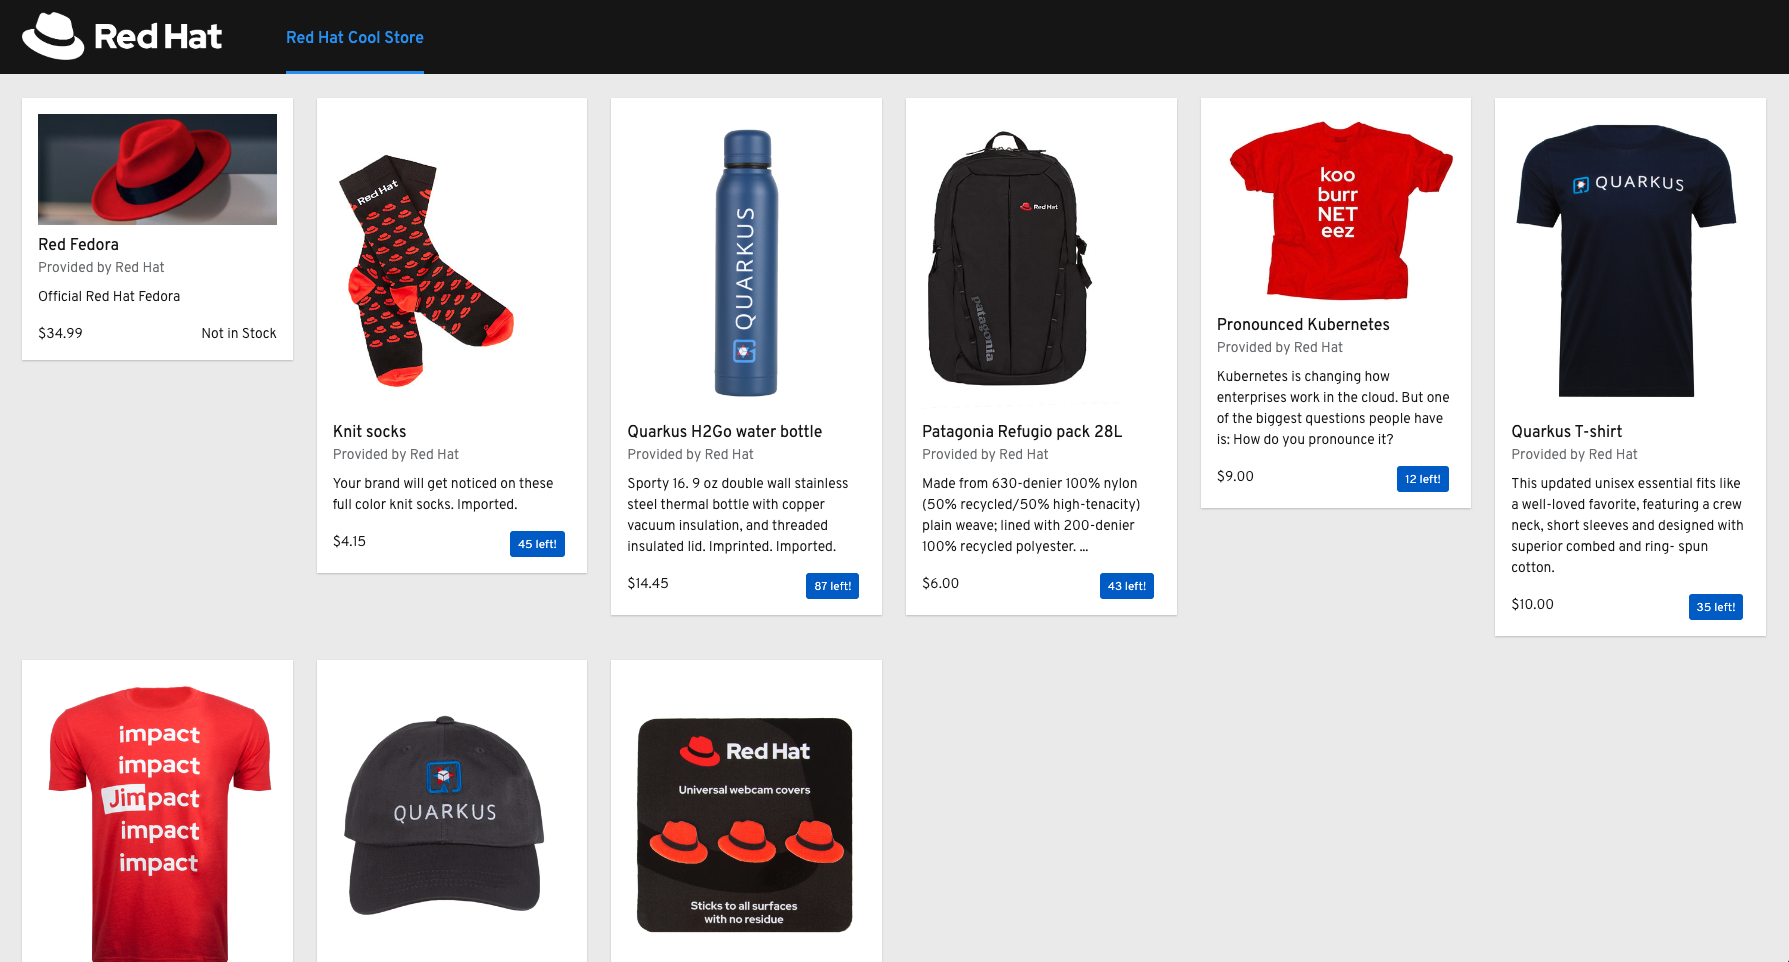
That’s it, you now have a better understanding of how the DevSecOps pipeline is combined with OpenShift GitOps for a multicluster deployment of the "Globex" application.
Using Security Policies in Red Hat Advanced Cluster Security (Red Hat ACS)
Review Trusted Signature Policy
-
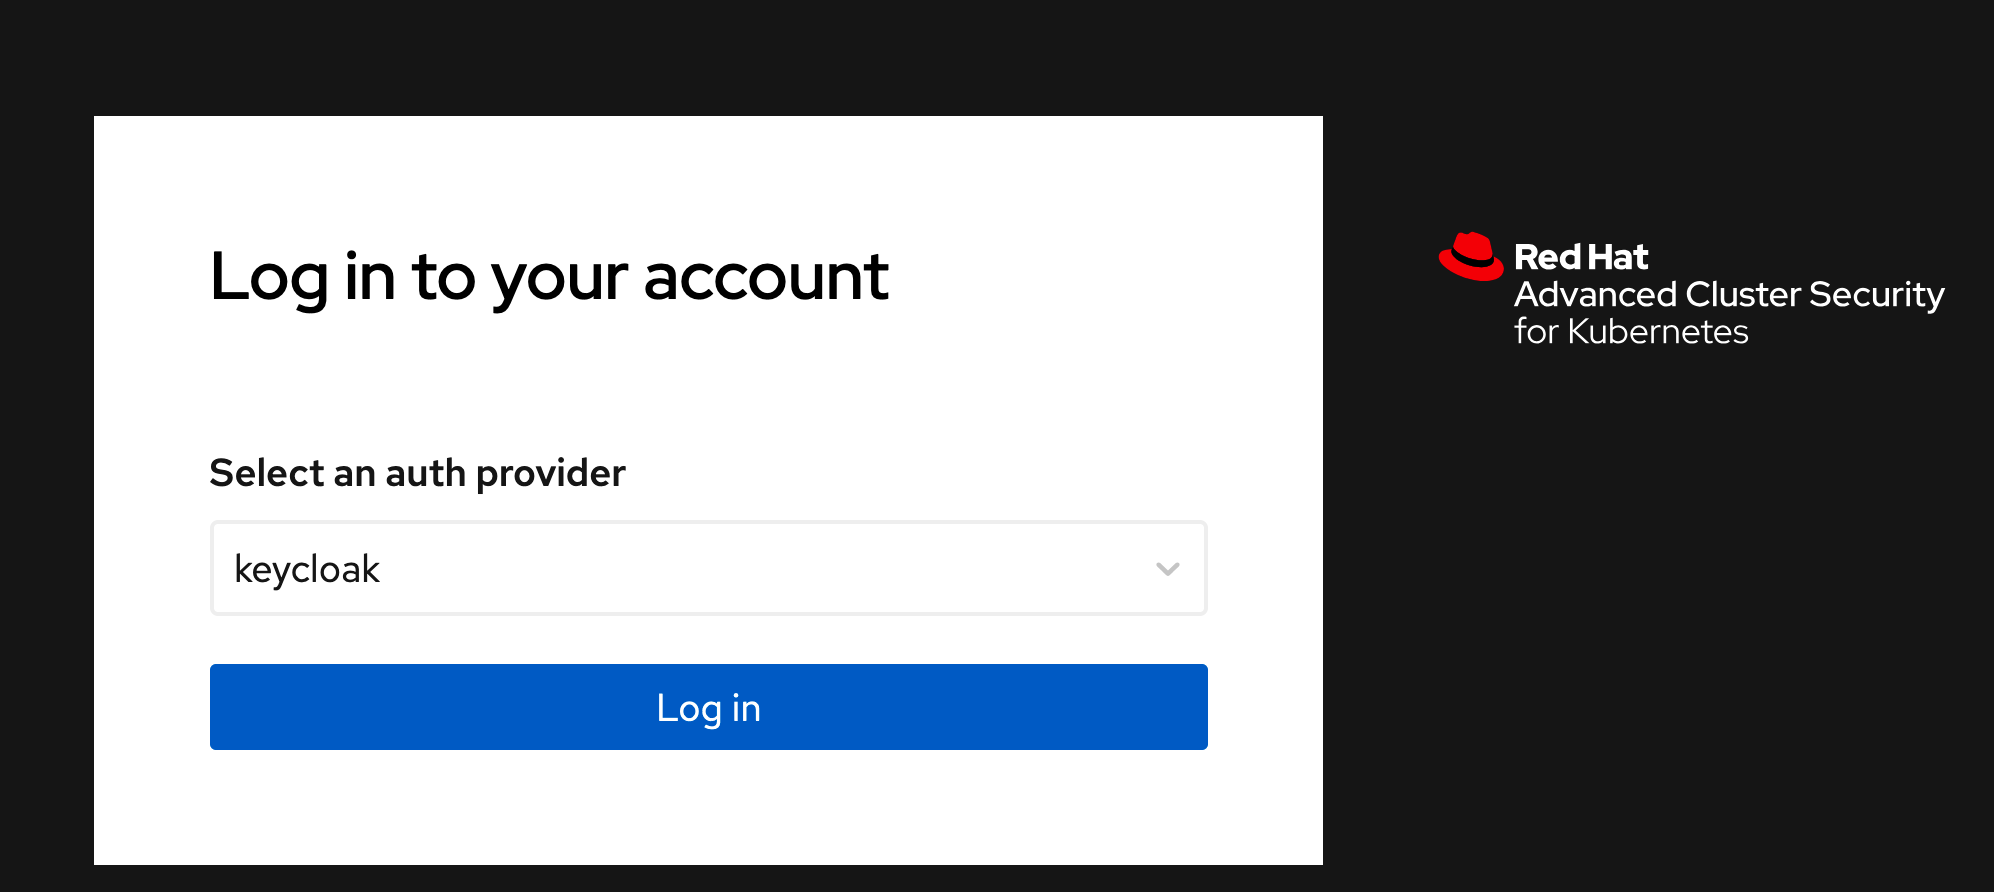
Open the Red Hat ACS console at https://central-stackrox.{openshift_cluster_ingress_domain}
-
Choose the "Keycloak" auth provider as shown below:
-
Login with Keycloak: username {user} and password {password}.
-
Once you are on the Red Hat ACS console, select "Platform Configuration → Policy Management" from the left-side menu. This should take you to the policies page.
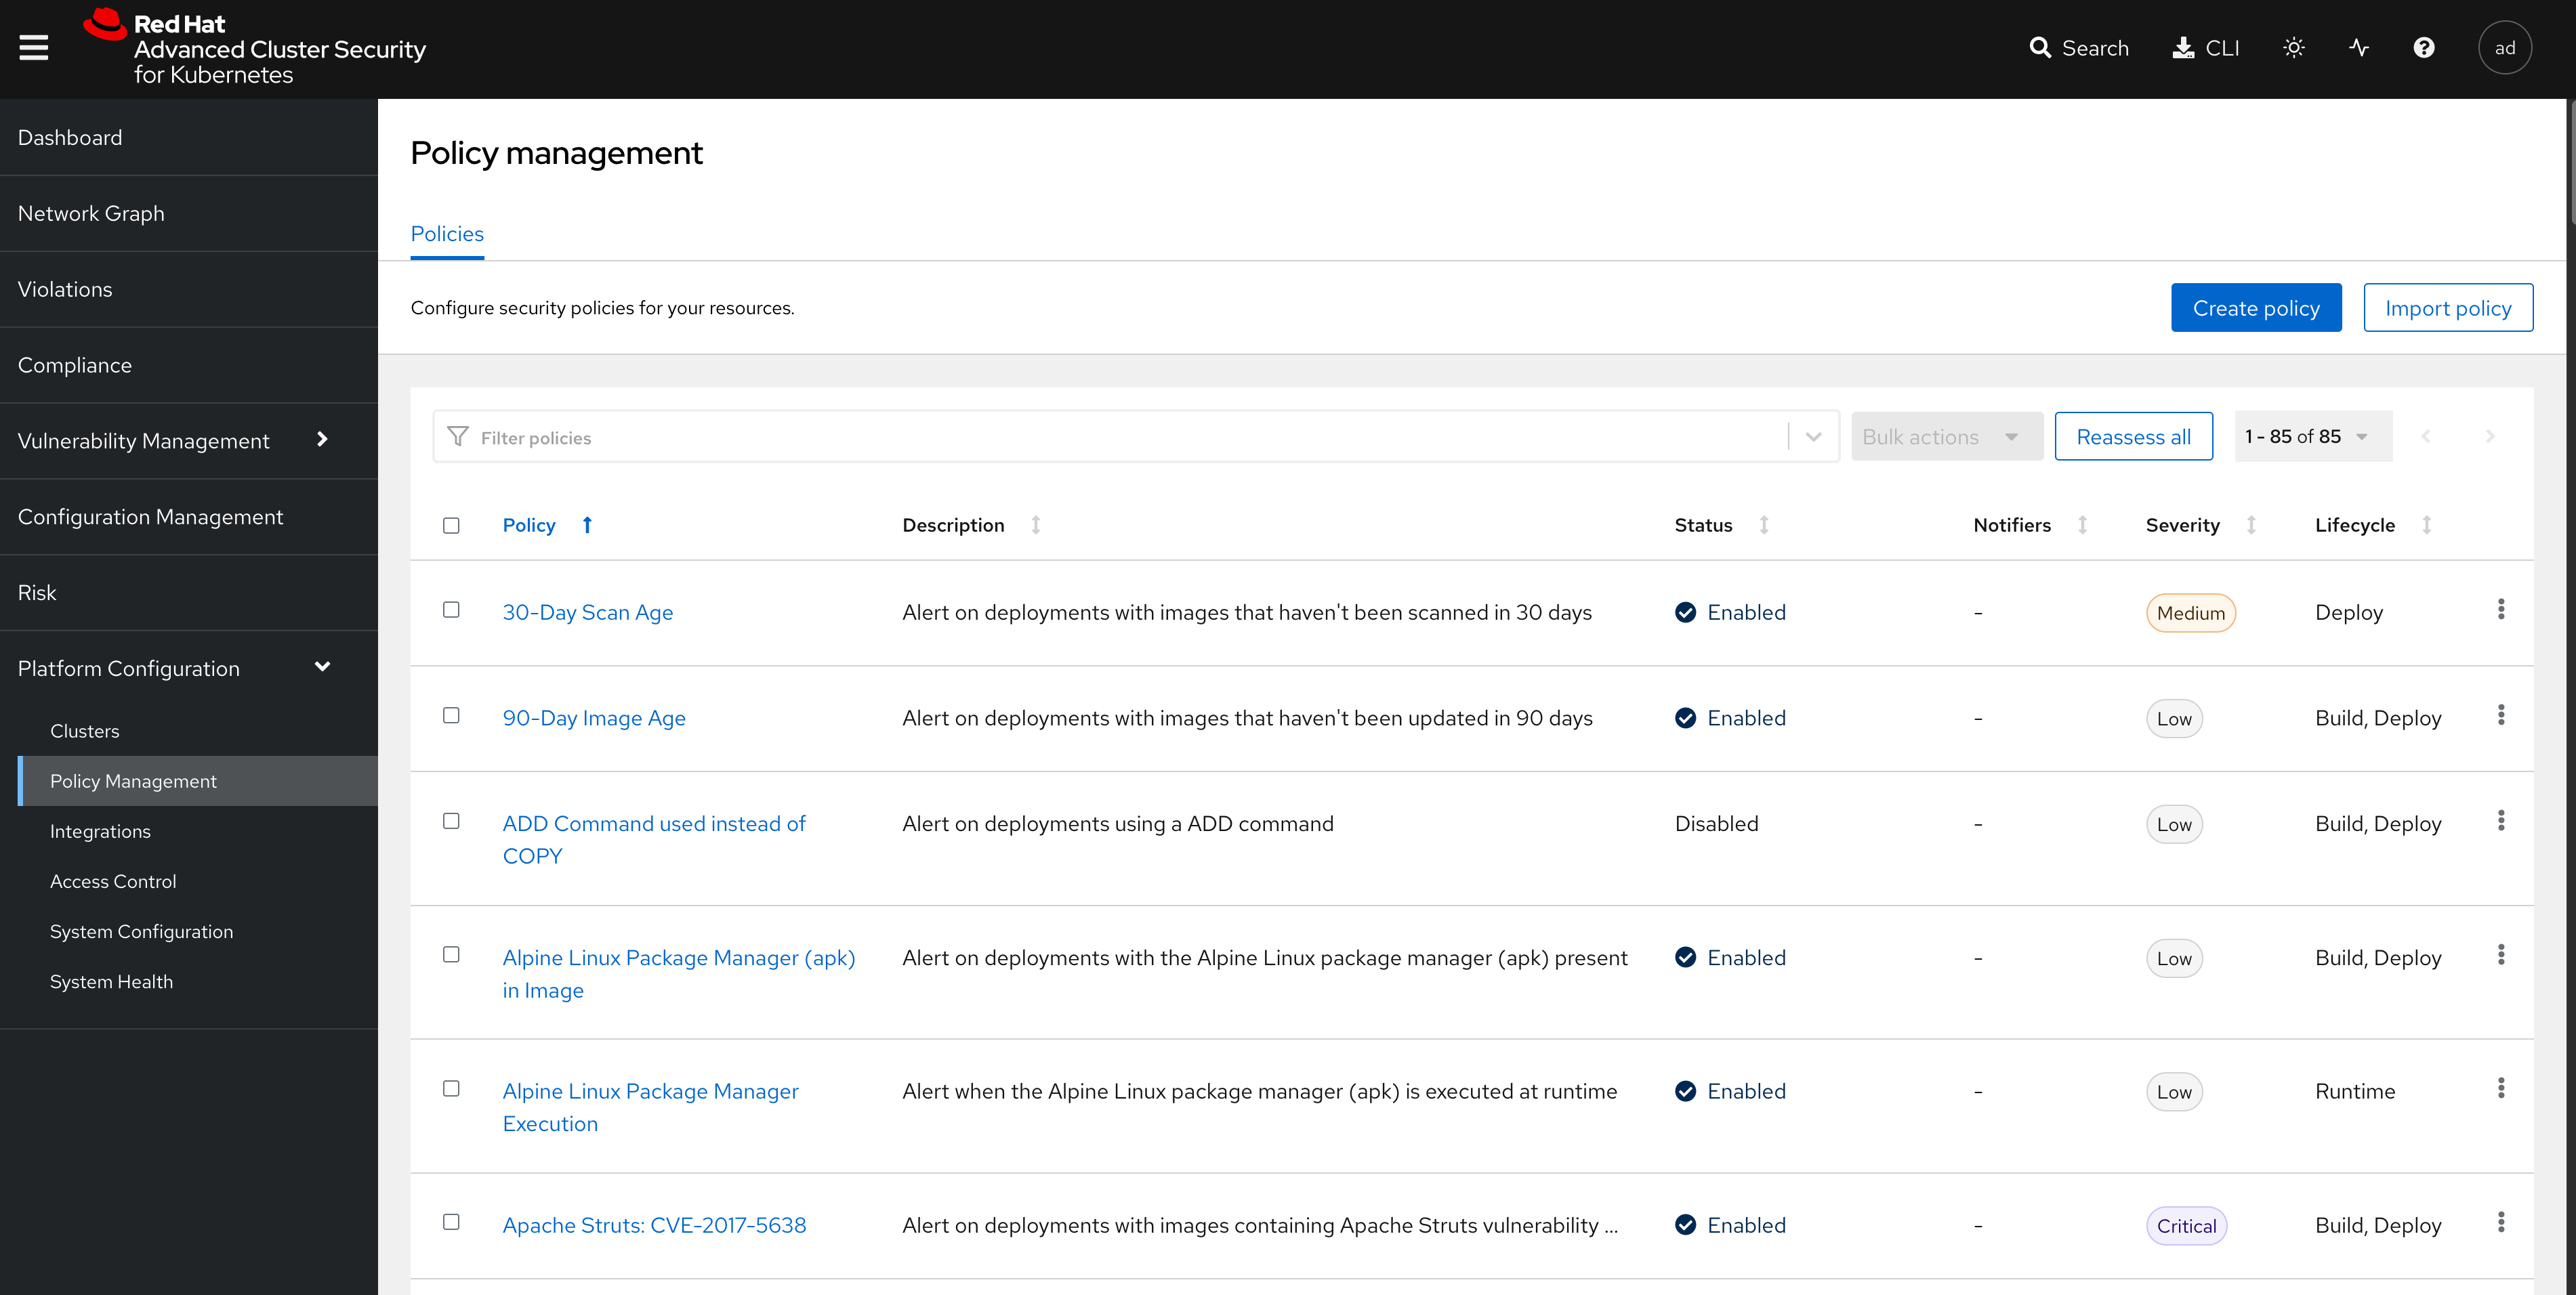
Red Hat ACS provides about 85 out-of-the-box policies to help implement security best practices and safeguards across your fleets of clusters, you can explore some of them by scrolling through the list of policies.
-
Let’s now look at the "Trusted Image Signature" policy. In the "Filter policies" section, type "Policy" then hit enter, then type "Trusted Signature".
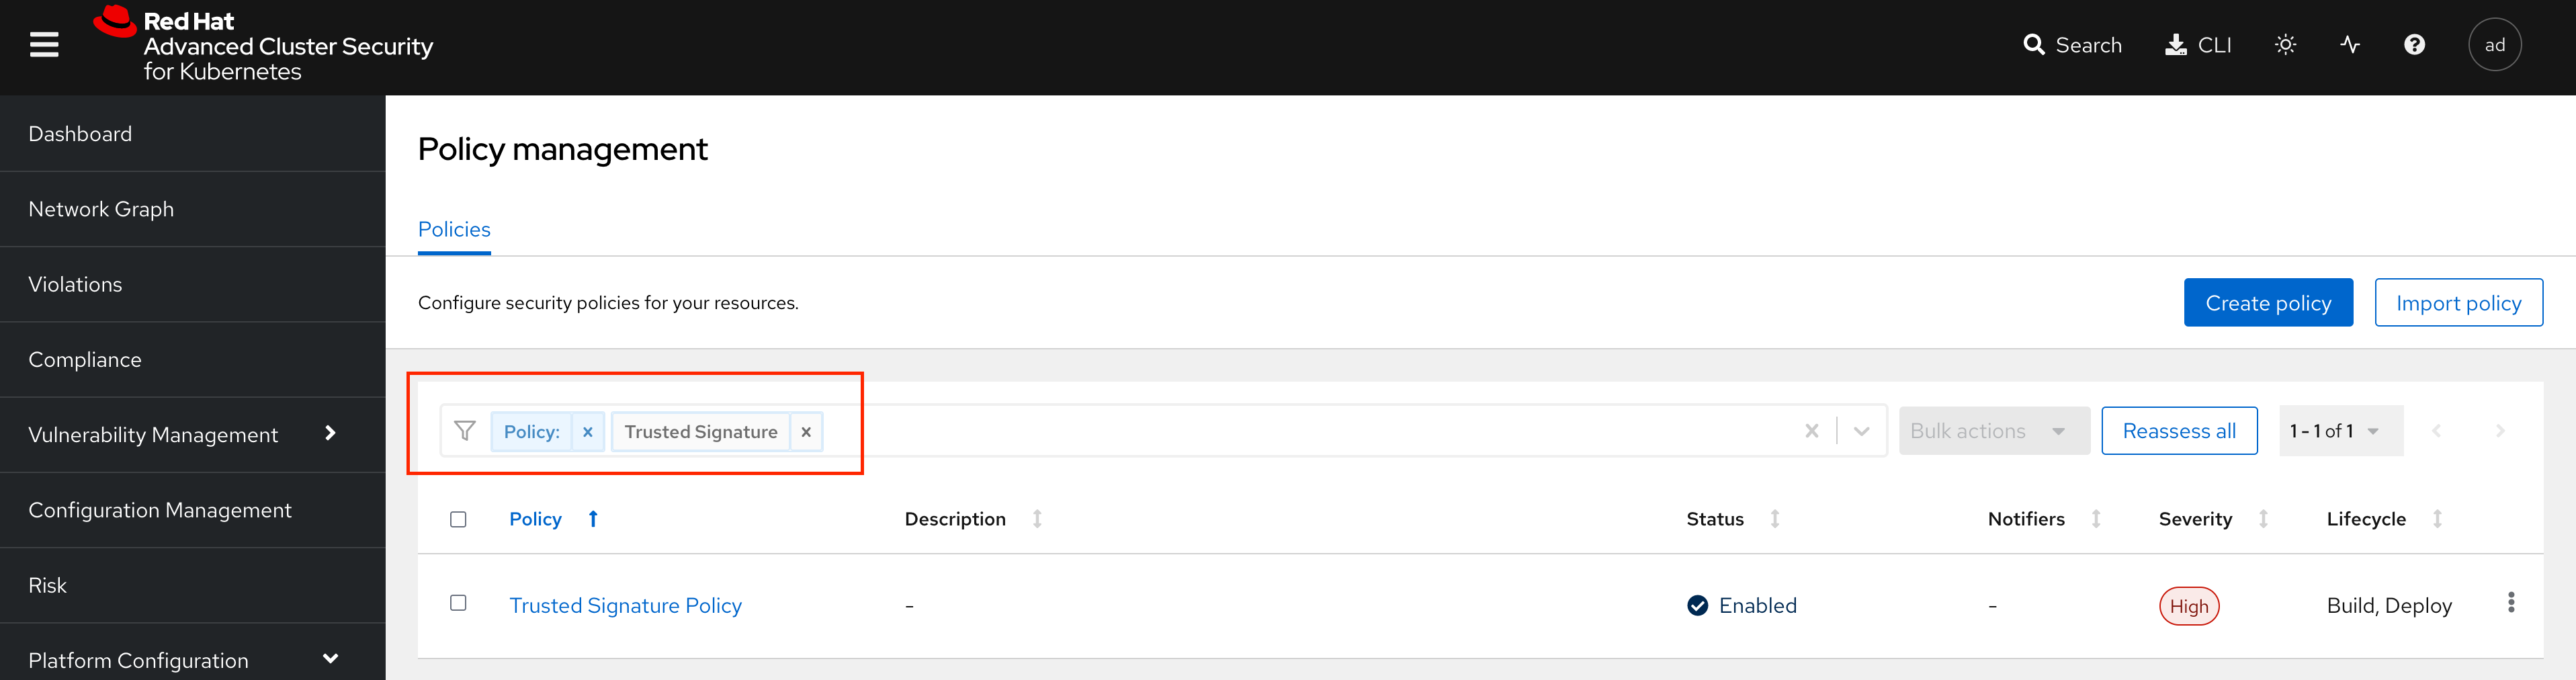
-
Click on the policy to check its details:
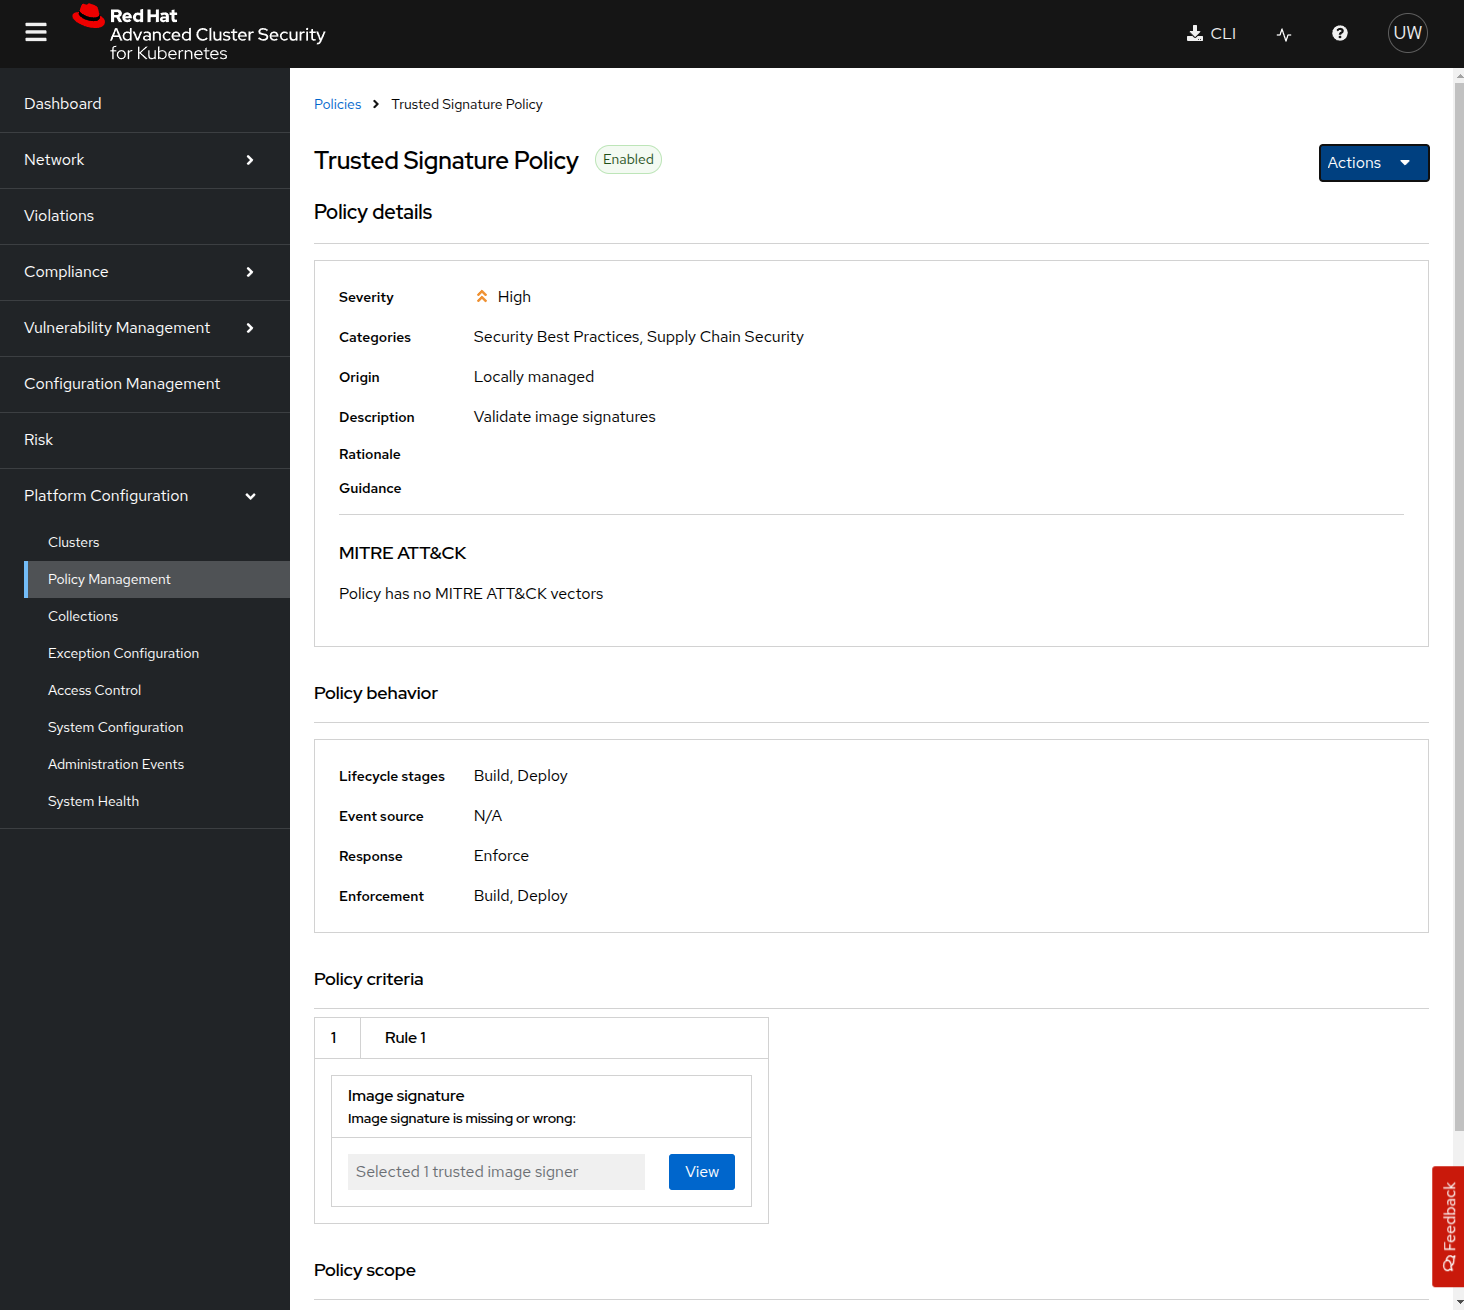
In the "Policy details" section the metadata and the Severity level and some other information is defined.
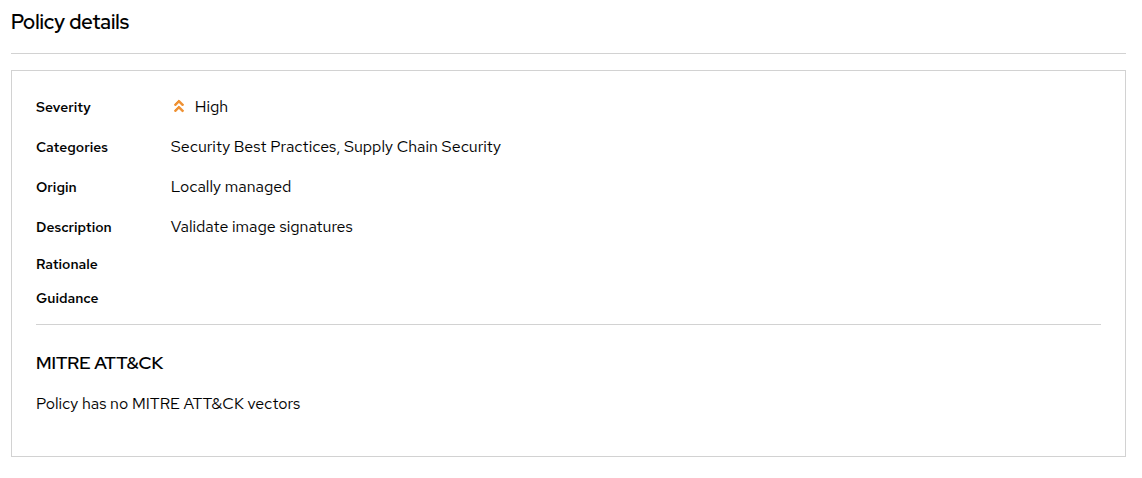
The section "Policy Behavior" is where you can define when and how the policy gets applied.

The "Lifecycle stages" allow you to define if it’s applied at Build, Deploy or Runtime. For this Policy, Build and Deploy stages have been chosen:
The response method provides 2 options:
-
Inform: the policy only triggers an alert but is not enforced, meaning it takes no specific action.
-
Inform and enforce: The policy triggers an alert AND is enforced, for example deleting a container that violates a specific policy, or in our previous case by breaking the pipeline because the container image was not signed with a trusted signature.
Finally, the "Enforce" gives you control over how the policy gets enforced, as explained in the different options.
The Policy Scope section at the bottom enables you to control the scope of the policy by selecting the required clusters and namespaces. Wildcards are supported as well selection via labels.
-
Next, click on "View" in the "Policy Criteria" section to explore how the signature verification is implemented.
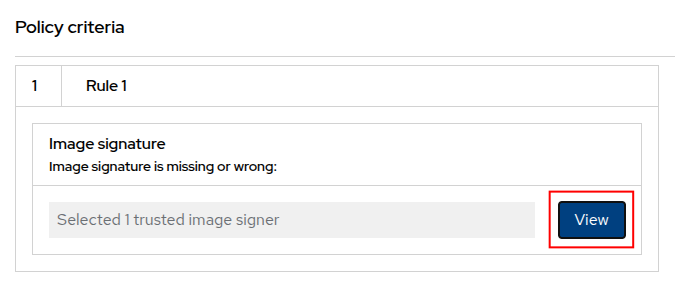
-
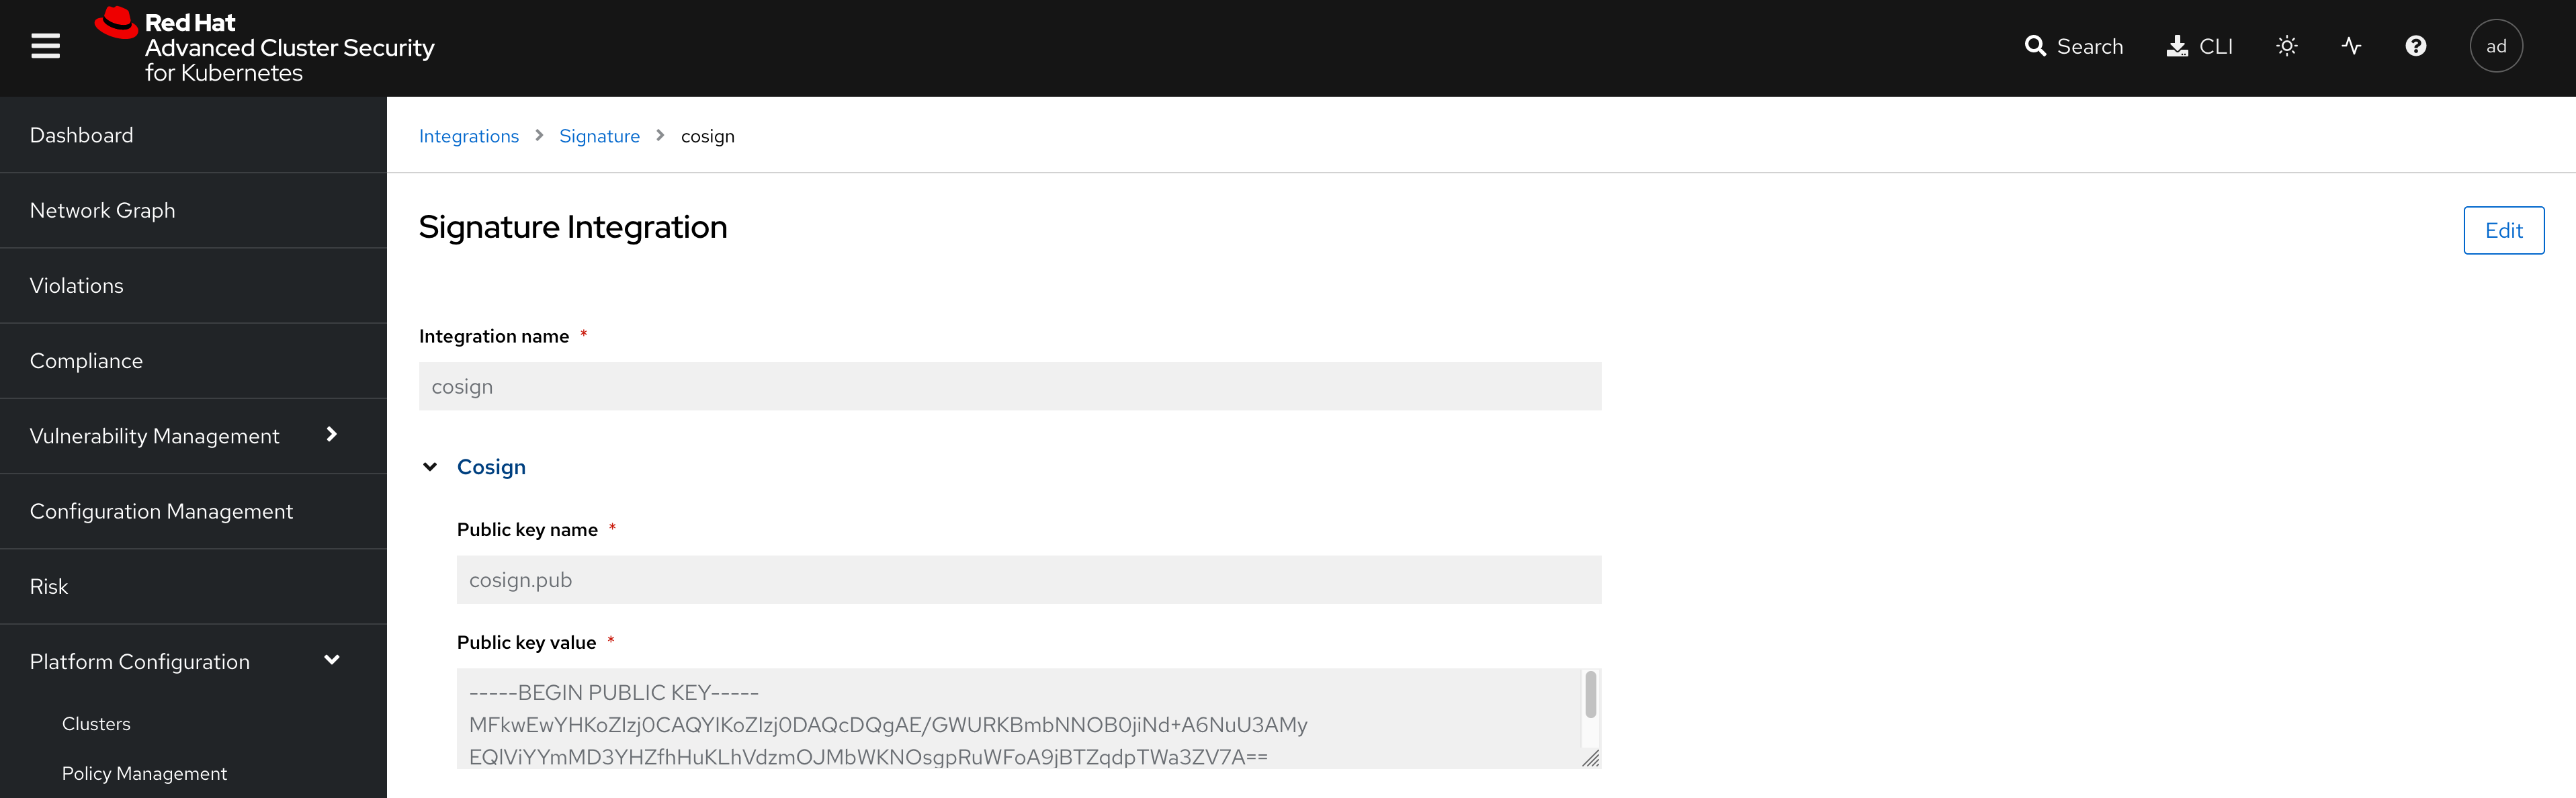
In the pop-up, click on "cosign", and this will take you to the public signature that is used to verify the container image, in pair with the private signature that is used by OpenShift Pipelines / Tekton Chains to sign the container images after the build. We will talk about the image signing process in more details in the next section.
Viewing Policy Violations
Now that we have reviewed the policy, let’s see review the policy violations for this policy.
-
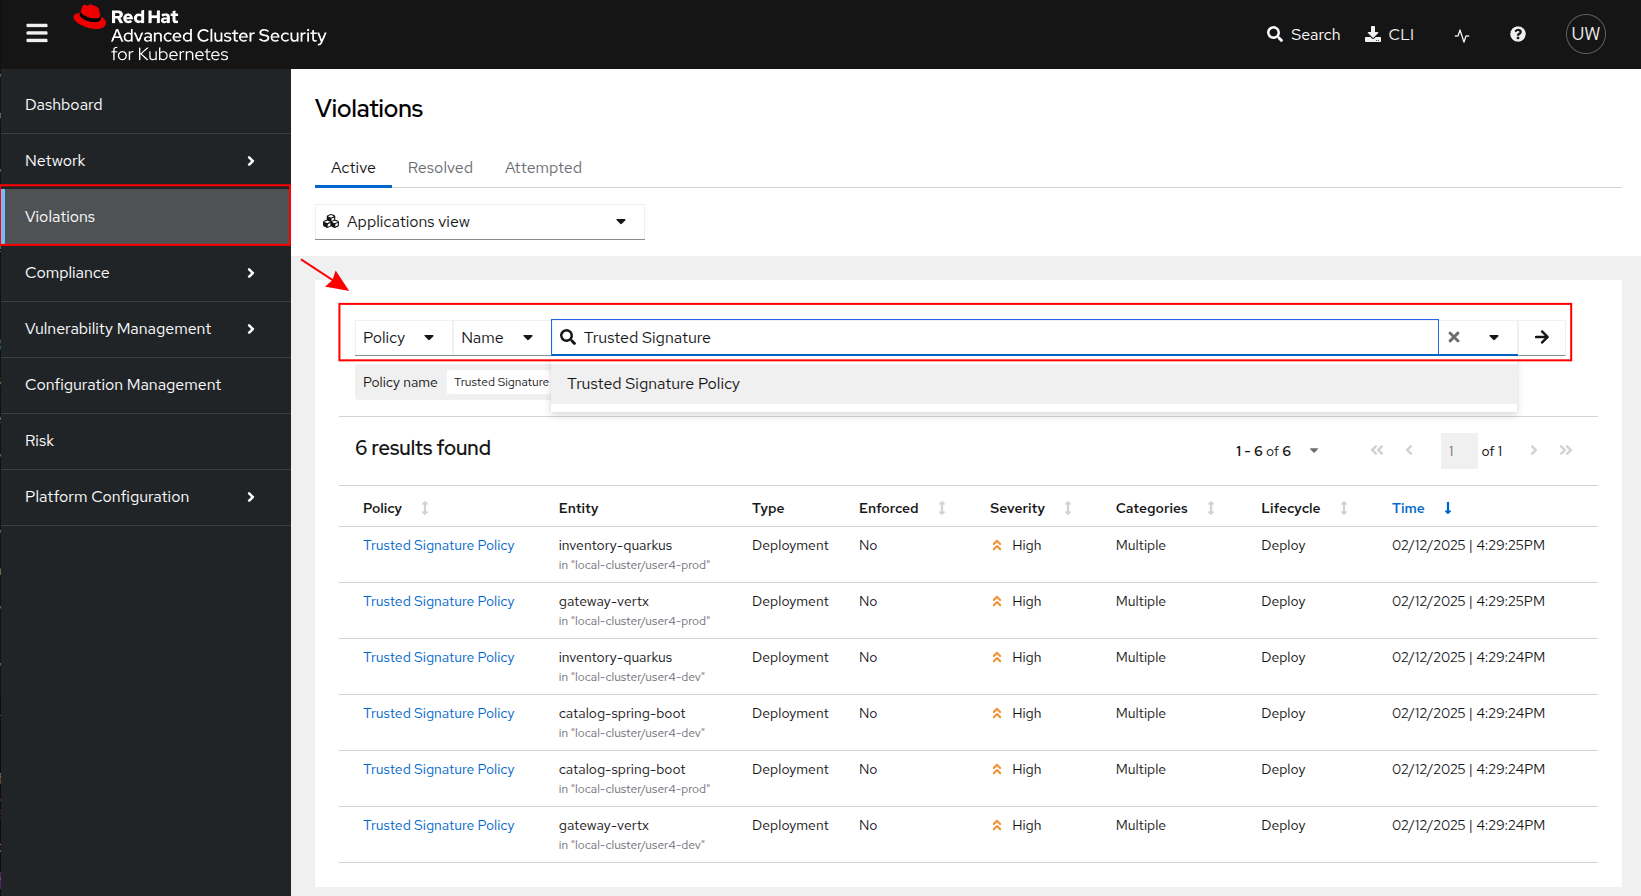
Click on
Violationsin the left sidebar and then in the filter add a filter for theTrusted Signature Policy
-
Notice all of the images violate this policy except for the
globex-uiimage which we just built with the Pipeline with a valid and verified signature.
If you are wondering why signature violations are not appearing from other namespaces, this Policy has been scoped to the {user}-dev and {user}-prod namespaces. Additionally ACS
has been configured for multi-tenancy so that your user only has permissions to view data generated from the namespaces and clusters you have been granted access to.
|
Viewing Vulnerabilities
Let’s now see how Red Hat ACS allows you to monitor your cluster security, by inspecting image vulnerabilities.
-
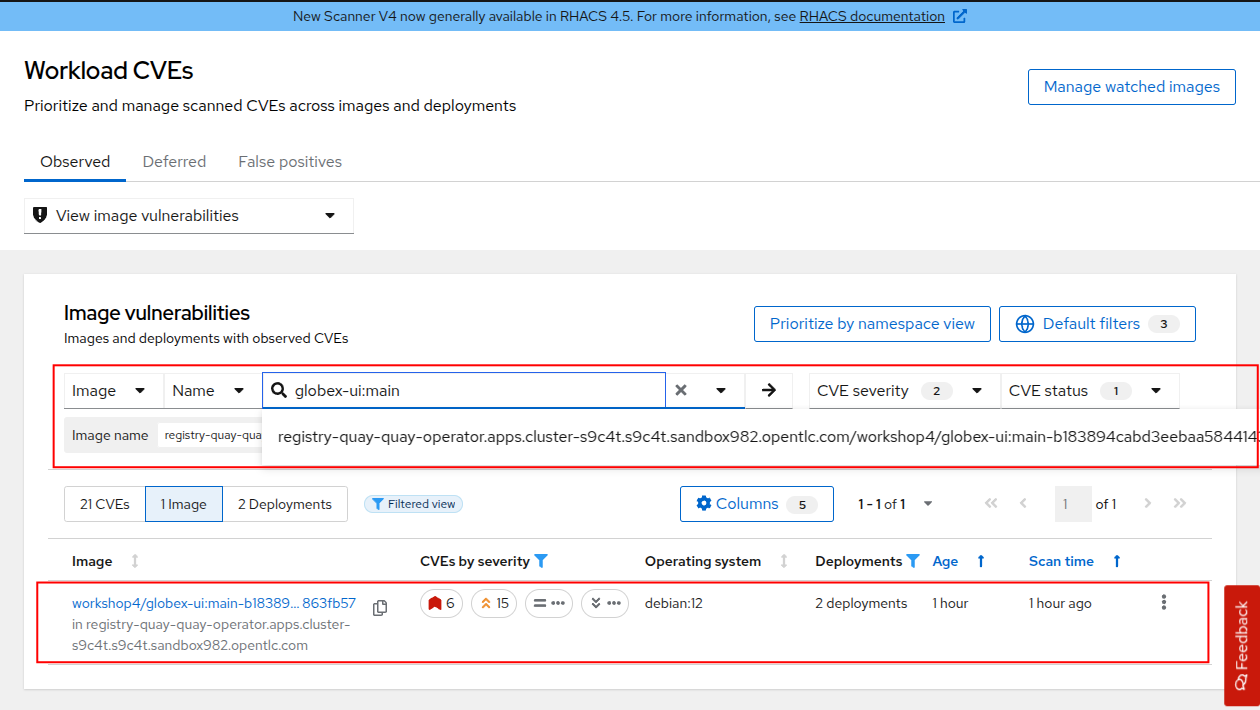
On the left-side menu, click on "Vulnerability Management → Workloads CVEs", then select Images in the filter.

-
In the filter section, type "Image" then hit enter, then type "globex-ui:main", and select the one that appears in the drop-down.

Click on the globex-ui:main image highlighted above and this will take you to the image details, where you see a listing of all CVEs, all components, and all the deployments (in Resources tab) that are using this image. This helps you understand and mitigate issues when there’s a compromised image for example.
| Red Hat Advanced Cluster Security provides a workflow around managing CVEs so that teams can request the deferral of specific CVEs in situations where fixes are not yet availble. The security or platform team would then be responsible for approving or denying those deferrals as needed. |
That’s it! You now have a better understanding of how Red Hat ACS allows you to define security policies that can in turn be used within the DevSecOps pipeline as security gates to prevent untrusted / undesirable content from getting into your production environments, and also continuously monitor the security of your multiple clusters and applications across all environments.
Red Hat Advanced Cluster Security has been configured for multiple-tenants so each user can only view information with regards to the namespaces that they manage. In your case, this is the {user}-xxxx namespaces. This is why you only see the image and deployments that pertain to you rather then other other workshop users who have also deployed their version of the globex-ui image.
|
Summary
Here a quick summary of all you’ve seen in this lab:
-
OpenShift Platform Plus provided is a comprehensive solution that provides multicluster management (RH ACM, not seen in the lab), continuous security (Red Hat ACS) and a Trusted Registry (Red Hat Quay) that serve as a great foundation to implement a Trusted Software Supply Chain and adopt a DevSecOps approach.
-
OpenShift Pipelines (based on Tekton) offers advanced CI/CD capabilities, and allow a direct integration with RH ACS to implement a DevSecOps approach. It also provides advanced capabilities like image signing through the Tekton Chains controller.
-
OpenShift GitOps (based on argocd) allows you to adopt a GitOps approach to deploy your application across different environments and multiple clusters, from development to production and all intermediate stages.
-
Red Hat Advanced Cluster Security offers out-of-the-box security capabilities such as security policies and image scanning for vulnerabilities to a continuous security monitoring across all your clusters.
Learning References
Red Hat OpenShift and Sigstore: A comprehensive blog explaining the integration of OpenShift with Cosign.
Using Tekton Chains for OpenShift Pipelines Supply Chain Security: Detailed documentation on implementing and understanding Tekton Chains within OpenShift.
ACS Integration Guide: A guide on integrating ACS with Cosign for enhanced container image verification.