The Power of GitOps with OpenShift GitOps(60 mins)
In this module you will understand how GitOps is used to manage cluster configuration and application deployments. This module assumes you have some familiarity with Argo CD.
Introduction
In this module we will deploy the Coolstore Application followed by the Pipeline using a GitOps methodology.
GitOps is the process that is used to deploy and manage cluster configuration and application deployments. In GitOps, git is the source of truth and the GitOps engine, OpenShift GitOps, reconciles what is stored in git with the state of the cluster. This process is two-way, changes to git can be automatically reconciled to the cluster and direct, manual changes in the cluster can be automatically reverted back to what is in git.
In this way GitOps provides a powerful way to manage state in Kubernetes clusters while addressing common issues like configuration drift, change management and auditing.
OpenShift GitOps is included with a standard OpenShift or OpenShift Platform Plus subscription, it provides a fully supported GitOps engine using the upstream Argo CD project. Argo CD is a popular GitOps engine for Kubernetes that provides a variety of features to manage a GitOps environment including the engine, a comprehensive user interface, etc.
Deploying Coolstore Application
In this section we will cover the basics of deploying an application with argocd using manifests in a git repository.
We will deploy the same coolstore application as previously, but this time we will do that using a GitOps approach.
We want to deploy that application to two namespaces: a "development" environment and a production environment, that we will later on update using the DevSecOps pipeline.
Deploy Application with Manifests
A managed collection of manifests is known as an Application within Argo CD.
Therefore, you must define it as such using an
Application
CRD (CustomResourceDefinition) in order to have Argo CD apply these manifests in your
cluster.
Let’s review the Application manifest used to deploy this application (found here)
and break this down a bit:
apiVersion: argoproj.io/v1alpha1
kind: Application
metadata:
  name: coolstore-app
spec:
  destination:
    namespace: $USER-dev
    name: in-cluster (1)
  project: $USER (2)
  source: (3)
    path: content/modules/ROOT/files/gitops/module-02
    repoURL: https://gitea-gitea.$SUBDOMAIN/$USER/workshop.git
    targetRevision: HEAD
  syncPolicy: (4)
    automated:
      prune: true
selfHeal: true| 1 | The destination server is API endpoint for the cluster where Argo CD is running — in this case, using the locally-resolvable URL for the cluster | ||
| 2 | Here you’re installing the application in Argo CD’s default project
(.spec.project).
|
||
| 3 | The manifest repo, and the path within it where the YAML resides. | ||
| 4 | The syncPolicy is set to automated with prune and selfHeal enabled.
Prune will automatically remove resources that have been removed from the Git
repo, selfHeal will automatically correct resources that deviate from the
definition stored in the repo, i.e manual changes made using oc or kubectl
will be "healed". |
OpenShift GitOps monitors your dedicated namespace {user}-argocd, where creating a resource of type Application creates an application in OpenShift GitOps.
You will create an Application by slightly modifying the provided example inline using the command below.
Before deploying the application, ensure you are in your user’s home directory:
cd ~Now let’s first deploy the application to the {user}-dev environment:
sed 's/$USER/{user}/' ~/workshop/content/modules/ROOT/examples/coolstore-gitops-dev.yaml | sed 's/$SUBDOMAIN/{subdomain}/' | oc apply -n {user}-argocd -f -Let’s then deploy the application to the {user}-prod environment:
sed 's/$USER/{user}/' ~/workshop/content/modules/ROOT/examples/coolstore-gitops-prod.yaml | sed 's/$SUBDOMAIN/{subdomain}/' | oc apply -n {user}-argocd -f -Now let’s login to OpenShift GitOps using this URL:
You can also find the links by clicking on the mosaic icon on the top-right of the openshift console:
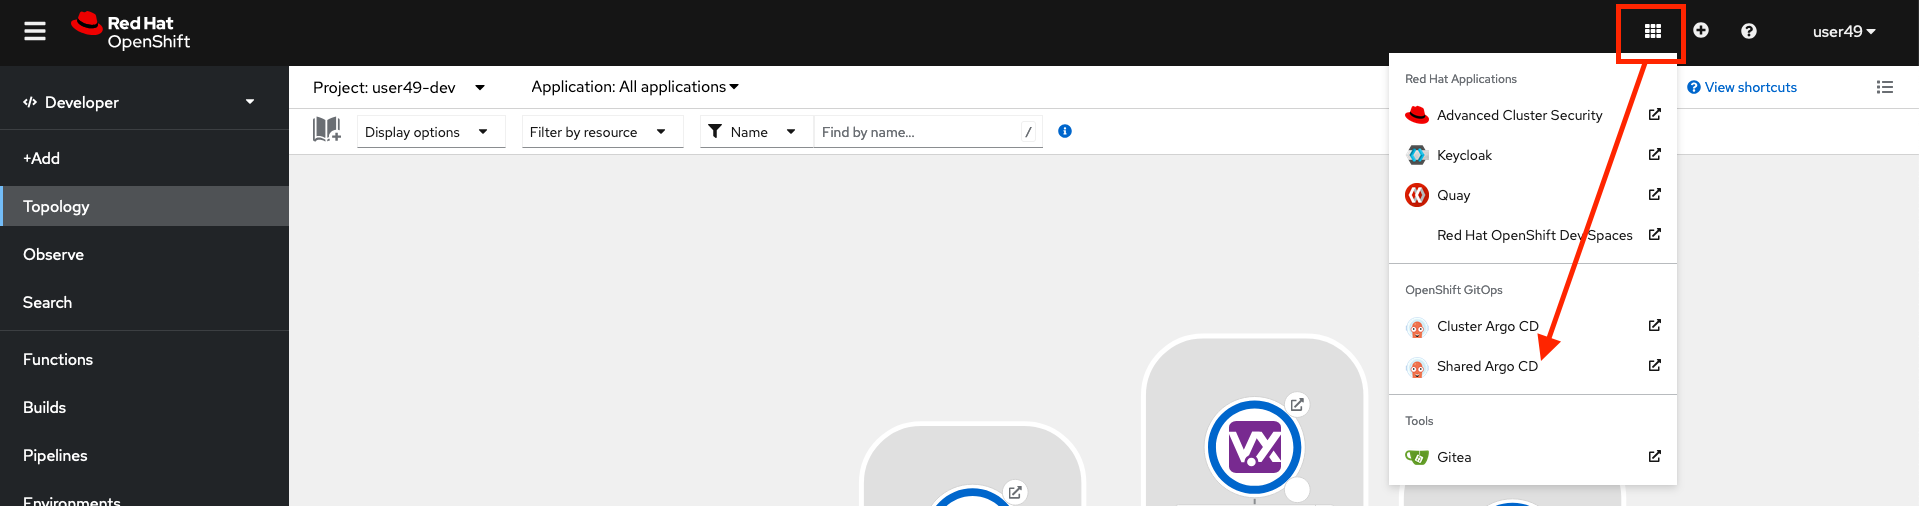
To login click the Keycloak button shown in red:
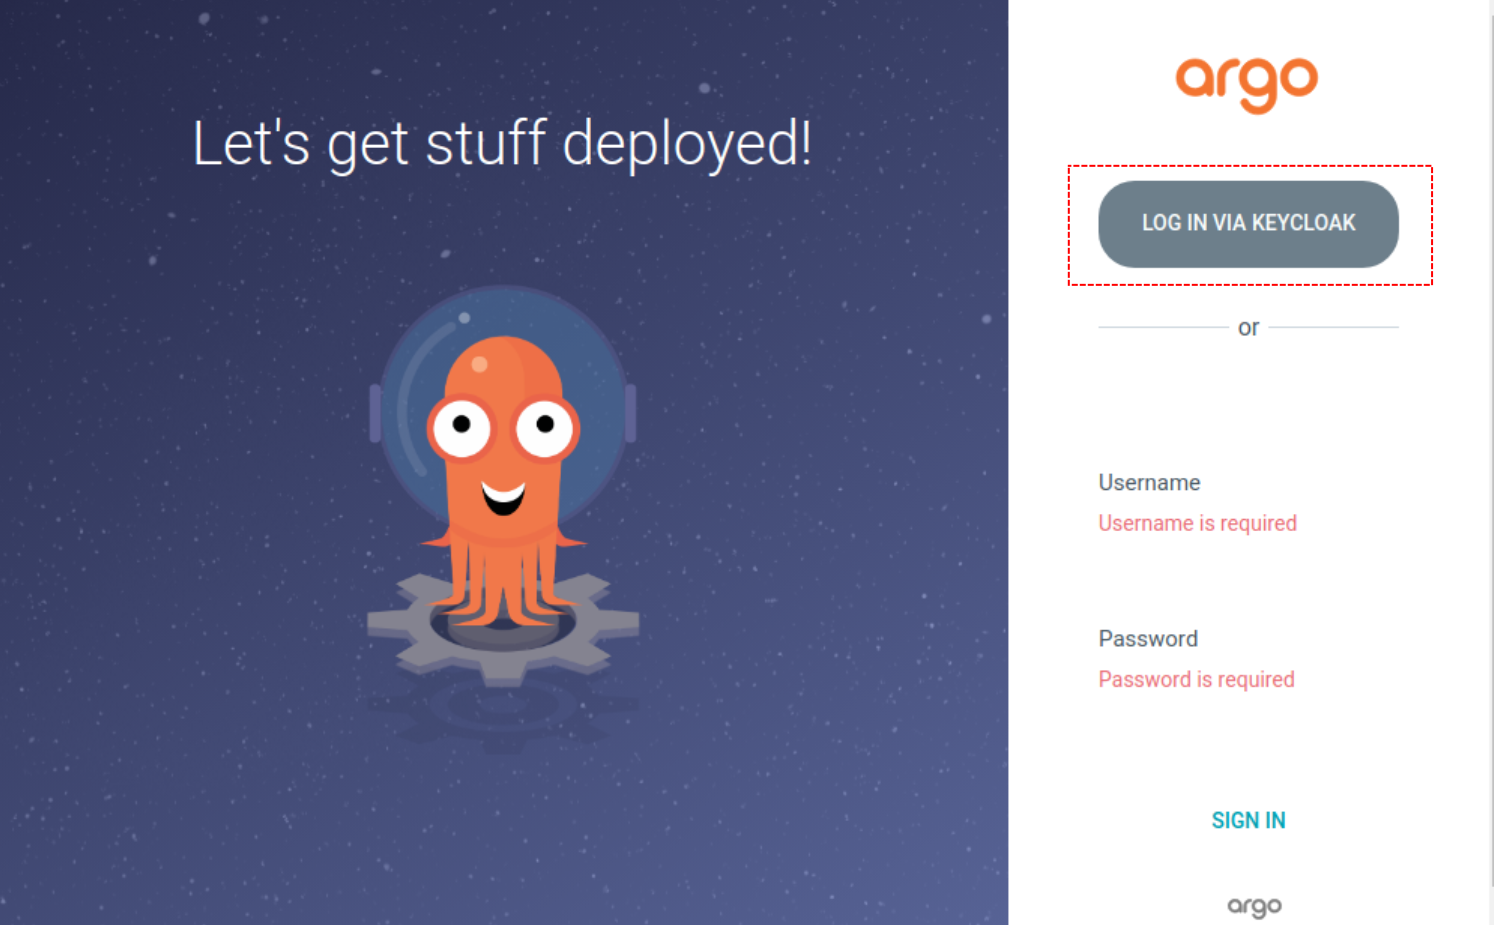
Assuming you have already logged into OpenShift with Keycloak you will be automatically logged into Argo CD since we are using Keycloak to provide Single-Sign-On in this workshop.
| If you need to login again, remember your credentials are {user}/{password}. |
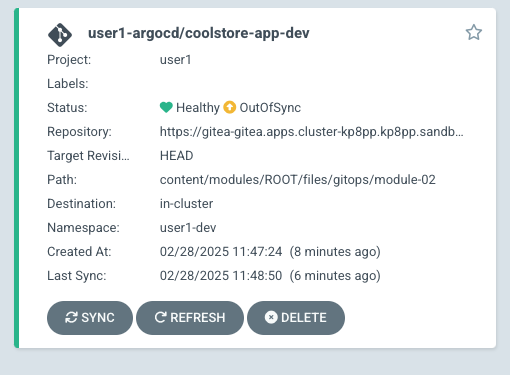
The newly created Applications appears as a tile with the titles coolstore-app-dev and coolstore-app-prod in the
Argo CD UI.
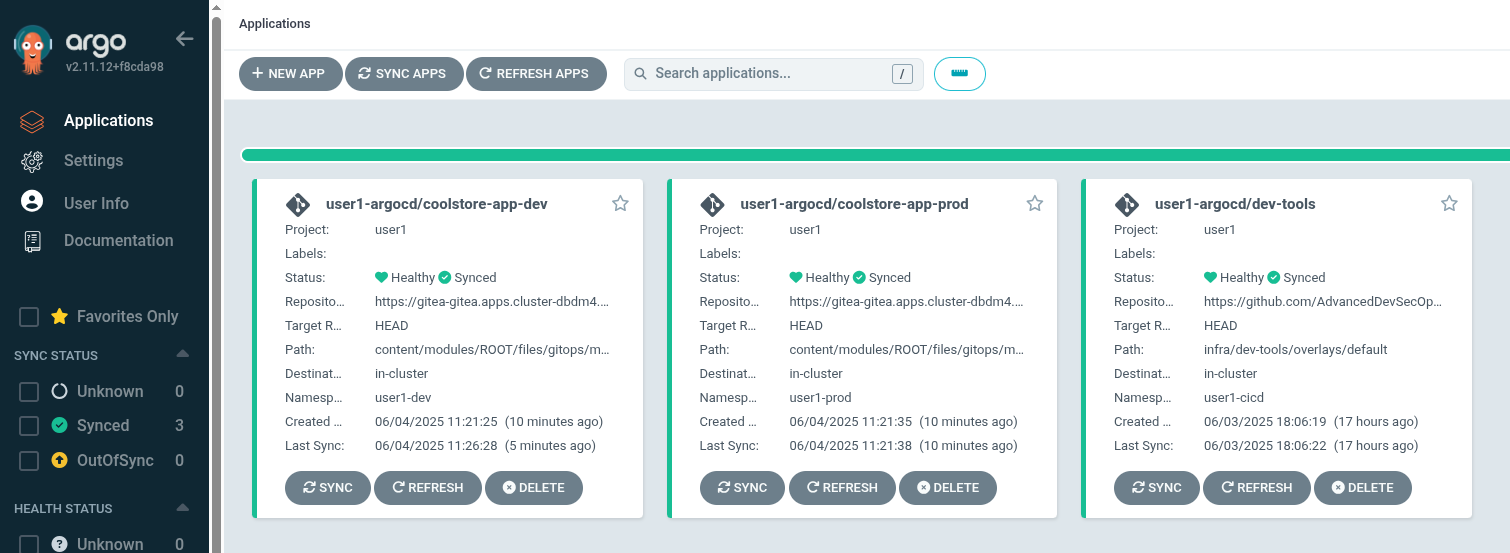
Clicking on this tile takes you to the application details page. You may see it as still progressing or fully synced.

At this point the application should be up and running. Verify that the resources were created by running this command in the right-side terminal:
oc get all -n {user}-devThe output should list several things:
NAME                                       READY   STATUS    RESTARTS   AGE
pod/catalog-spring-boot-5564b65bbf-n98rm   1/1     Running   0          77s
pod/gateway-vertx-5c5dd94dfd-jzsjj         1/1     Running   0          77s
pod/inventory-quarkus-64f5b79fc8-5kncz     1/1     Running   0          25m

NAME                          TYPE        CLUSTER-IP       EXTERNAL-IP   PORT(S)                      AGE
service/catalog-spring-boot   ClusterIP   172.30.100.248   <none>        8080/TCP,8443/TCP            77s
service/gateway-vertx         ClusterIP   172.30.249.65    <none>        8080/TCP,8443/TCP,8778/TCP   25m
service/inventory-quarkus     ClusterIP   172.30.67.189    <none>        8080/TCP                     25m

NAME                                  READY   UP-TO-DATE   AVAILABLE   AGE
deployment.apps/catalog-spring-boot   1/1     1            1           77s
deployment.apps/gateway-vertx         1/1     1            1           25m
deployment.apps/inventory-quarkus     1/1     1            1           25m

NAME                                             DESIRED   CURRENT   READY   AGE
replicaset.apps/catalog-spring-boot-5564b65bbf   1         1         1       77s
replicaset.apps/gateway-vertx-5c5dd94dfd         1         1         1       77s
replicaset.apps/inventory-quarkus-64f5b79fc8     1         1         1       25m

NAME                                      SERVICES        PORT       TERMINATION
route.route.openshift.io/gateway-vertx   gateway-vertx   8080-tcp   edge/Redirect
Wait for the rollout of the new pods to happen in the deployment:
oc rollout status deploy/inventory-quarkus -n {user}-devIf it is successful, you can now visit the deployed application in the browser.
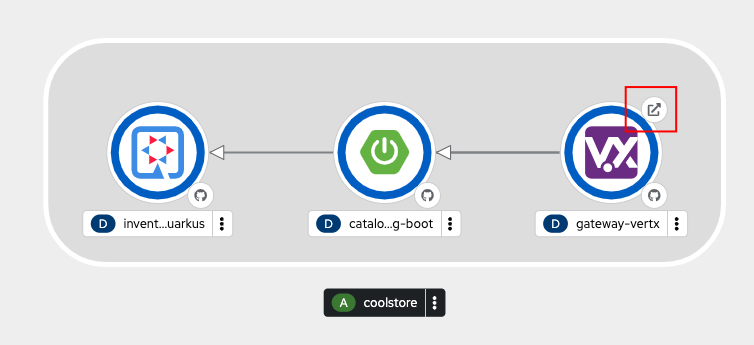
From the OpenShift web console, select {user}-dev Project from
drop-down menu, and use the Topology view and click on the route shortcut
for the gateway-vertx application.
Alternatively, get the app Route from the CLI:
oc get route gateway-vertx -n {user}-dev -o jsonpath='{"http://"}{.spec.host}{"\n"}'| This route is only available via HTTP. If you try to visit via HTTPS, you will get an Application not available error. Do you know why that is? |
Addressing Configuration Drift
Let’s introduce a change in the application environment! We will scale up the replicas, and see how OpenShift GitOps manages the drift in that case.
oc -n {user}-dev scale deploy inventory-quarkus --replicas=2You can see that the pods will start to get created, but instantly get deleted again. This is because OpenShift GitOps is automatically setting the replicas number to 1, as specified in the application manifest for the quarkus-inventory deployment.
You can set up Argo CD to automatically correct drift by setting the selfHeal
property of the Application manifest to do so. Using the example from above:
# coolstore-gitops.yaml
...
spec:
  syncPolicy:
    automated:
      prune: true
      selfHeal: true
As an exercise, lets try disabling the Self-healing behavior by patching the application with this command:
oc patch application/coolstore-app-dev -n {user}-argocd --type=merge -p='{"spec":{"syncPolicy":{"automated":{"prune":true,"selfHeal":false}}}}'And then repeat the process of changing the replicas:
oc -n {user}-dev scale deploy inventory-quarkus --replicas=2Notice that the Application is now showing an out-of-sync status:
Note that when Self Heal is not enabled you can manually sync your app via the Argo CD UI by:
-
First clicking
SYNC -
Then clicking
SYNCHRONIZE

After the sync process is done, the Argo CD UI would mark the application as in sync.
ApplicationSets
In the previous sections we deployed the development and production versions of the coolstore-app as individual Applications. However there
are often situations, as per what we did previously, where you want to deploy or generate multiple versions of the same Application with variations.
This is where the Argo CD ApplicationSet feature comes into play. ApplicationSets enables you to generate Application resources using templating. Each ApplicationSet can include one or more generators that power the creation of Applications. Argo CD currently includes many different generators and enables users to create custom generators via a Plugin architecture.
There are a number of generators available, some common examples of these generators include:
-
Using the List generator for generating applications for different environments. We will look at an example of this shortly
-
Leveraging the git generator to create Applications based on the contents of a git repo, we will look at this in Module 4 as a more dynamic way to generate apps for environments.
-
Using the Pull Request generator to provision new environments on the fly to run automated tests before merging the code.
-
Using the Cluster generator to provision an Application across multiple clusters.
-
Using the Matrix and Merge to combine the results from multiple generators.
Let’s look at a simple example of an Application that uses a List generator to create the development and production Applications
for the coolstore-app Application we deployed earlier.
Deploy the ApplicationSet using the following command:
sed 's/$USER/{user}/' ~/workshop/content/modules/ROOT/examples/coolstore-gitops-appset.yaml | sed 's/$SUBDOMAIN/{subdomain}/' | oc apply -f - -n {user}-argocdNext have a look at the ApplicationSet that was deployed with this command:
oc get appset coolstore-apps -o yaml -n {user}-argocd | oc neatapiVersion: argoproj.io/v1alpha1
kind: ApplicationSet
metadata:
name: coolstore-apps
namespace: {user}-argocd
finalizers:
- resources-finalizer.argocd.argoproj.io (1)
spec:
generators:
- list: (2)
elements:
- environment: dev (3)
- environment: prod
goTemplate: true
goTemplateOptions:
- missingkey=error
template: (4)
metadata:
name: coolstore-app-{{.environment}} (5)
namespace: {user}-argocd
spec:
destination:
name: in-cluster
namespace: {user}-{{.environment}}
project: {user}
source:
path: content/modules/ROOT/files/gitops/module-02
repoURL: https://gitea-gitea.{subdomain}/{user}/workshop.git
targetRevision: HEAD
syncPolicy:
automated:
prune: true
selfHeal: true| 1 | Argo CD will automatically delete the Applications when the ApplicationSet is deleted. Including a finalizer ensures that the resources the Application deployed will also be deleted. See more information here. |
| 2 | We are using the list generator which enables us to provide a static list of elements to dynamically
generate applications, basically it is 1:1 per element |
| 3 | Each element has one value, environment, which will be templated into the resulting Application object. |
| 4 | The template section is where we define the Application resource that the ApplicationSet will create |
| 5 | Here is an example of referencing the environment value to template the name. |
Note that while we created these Applications earlier, the ApplicationSet will now assume ownership of them, This can be validated with the following command:
oc get app coolstore-app-dev -o=jsonpath='{.metadata.ownerReferences}' -n {user}-argocd | jq -s .[
[
{
"apiVersion": "argoproj.io/v1alpha1",
"blockOwnerDeletion": true,
"controller": true,
"kind": "ApplicationSet",
"name": "coolstore-apps",
"uid": "1cb40de5-09a0-440e-a12e-28941e9c81b1"
}
]
]As we can see ApplicationSets provide an easy way to generate Application objects both statically, but more importantly as we will see in module 4, dynamically.
Helm
Helm is a package and install manager that standardizes and simplifies packaging and deployment of containerized applications with Kubernetes. Unlike Kustomize, which uses a patching approach, Helm uses templating to enable users to tailor the deployed manifests as required.
Exploring Helm
The principles of 'Helm' are as follows:
-
A package manager for Kubernetes with applications packaged as charts
-
Uses templates to enable applications to be configured per installation
-
Parameters for the chart are held in a
values.yamlfile and consumed by the templates
Exploring the Helm CLI
Similar to Kustomize from the previous lab, the helm CLI should have been installed as part of the lab
setup. Verify that it has been installed.
helm version --shortThis should display the version, it should look something like this.
{v3.14.4+37.el9+g7163c12}Helm is a package manager that can be used to install a Helm chart into a kubernetes cluster and can then manage the lifecycle of the application including upgrades and uninstalling the application. However Helm can also render the chart as pure yaml without installing the application in a cluster.
Helm Charts will be a set of manifests that will define your application for Kubernetes.
Argo CD follows a philosophy of managing manifests and as a result it interacts with Helm by having Helm templating the chart. It does not install the chart in a Kubernetes cluster. The lifecycle of a Helm chart in Argo CD is managed by updating the version of the chart Argo CD is using and having Argo CD render the new version of the chart.
As a result for the purpose of this workshop we will be focusing on the helm template
command rather than helm install.
Deploying Application with Helm
In this section we will explore the chart that we will be deploying into the cluster using GitOps.
This chart will be used to deploy the devsecops pipeline that will be used with the applications we did previously. We will work with a chart in the
content/modules/ROOT/files/gitops/helm/globex-ui directory within the
repository you cloned.
cd ~/workshop/content/modules/ROOT/files/gitops/helm/globex-uiNext if you run the ls command you should see two files: Chart.yaml and values.yaml, as well
as a directory called templates. Let’s have a look at these in more detail.
apiVersion: v2
name: globex-ui-pipeline
description: A Helm chart to deploy Globex UI pipeline resources for Kubernetes
type: application

version: 0.1.0
appVersion: 0.1.16
This file is the chart definition which specifies name, version and other characteristics of the chart.
#ODF Chart Values

globex:
  registry:
    url: ""
  sonarqube:
    hostUrl: ""
The values.yaml file is the default set of values that will be used by the chart. When templating or installing the chart
you can provide your own values.yaml to override some or all of these defaults as needed for a specific use case.
Notice that since this is a yaml file parameters can be hierarchical which enables grouping related parameters together as shown
by the gitea section.
The templates/ directory is where template files reside. When Helm assesses a chart, it processes all files in the templates/ directory using the template rendering engine. The results of these templates are then gathered and forwarded to Kubernetes.You can learn more about templating here.
Helm Template
In this section, we will explore how to use the helm template command to generate Kubernetes manifests from a Helm chart. This command is a fundamental tool for understanding how Helm charts work and for visualising the resources they create.
Step 1: Run the Helm template Command
Execute the following command to render the chart template from your local directory and display the output on the screen:
helm template globex-ui ~/workshop/content/modules/ROOT/files/gitops/helm/globex-uiStep 2: View the Output
After running the command, you will see the output of the helm template command, which represents the generated Kubernetes manifest files. Below is an example of what you can expect to see:
You will see the output of the helm template, which is lengthy, so this is just an excerpt:
# Source: globex-ui-pipeline/templates/task-scan-code.yaml
apiVersion: tekton.dev/v1beta1
kind: Task
metadata:
  name: scan-code
spec:
  params:
  - default: docker.io/sonarsource/sonar-scanner-cli:10.0
    name: scanImage
    type: string
  - default: https://sonarqube-sonarqube.apps.cluster-tpn6s.sandbox2653.opentlc.com/
    name: sonarqubeHostUrl
    type: string
  - default: object-detection-rest
    name: sonarqubeProjectKey
    type: string
  - default: object-detection-rest-sonarqube-secret
    name: sonarqubeProjectSecret
    type: string
  - default: "true"
    name: verbose
    type: string
  steps:
  - env:
    - name: SONAR_TOKEN_WEB_UI
      valueFrom:
        secretKeyRef:
          key: token
          name: $(params.sonarqubeProjectSecret)
    image: $(params.scanImage)
    name: scan-code
    script: |
      set -x
      echo $(ls -a)
      sonar-scanner -X -Dsonar.projectKey=$(params.sonarqubeProjectKey) -Dsonar.sources=./ -Dsonar.host.url=$(params.sonarqubeHostUrl) -Dsonar.login=$SONAR_TOKEN_WEB_UI
    workingDir: /workspace/repository
  workspaces:
  - name: repository
Using Helm charts to deploy applications in Argo CD
In this section, we will utilize Helm charts to deploy applications within Argo CD. Helm charts provide a convenient way to manage and deploy Kubernetes applications. We will first examine the configuration file for an Argo CD Application that deploys a Helm chart for the app. This file contains essential configuration details such as the destination, source, project, and sync policy.
Step 1: View the Argo CD Application Configuration
To view the YAML configuration file for the Argo CD Application, execute the following command:
cat ~/workshop/content/modules/ROOT/examples/pipeline-helm-app.yamlYou should see the following output:
apiVersion: argoproj.io/v1alpha1
kind: Application
metadata:
  name: pipeline-helm
spec:
  destination:
    namespace: $USER-cicd
    name: in-cluster
  source:
    path: content/modules/ROOT/examples/globex-ui
    repoURL: 'https://gitea-gitea.$SUBDOMAIN/$USER/workshop.git'
    targetRevision: main
  sources: []
  project: $USER
  syncPolicy:
    syncOptions:
      - RespectIgnoreDifferences=true
    automated:
      prune: true
      selfHeal: true
  ignoreDifferences:
  - group: ""
    kind: ServiceAccount
    name: pipeline
    jsonPointers:
    - /imagePullSecrets
This YAML configuration defines an Argo CD Application named "pipeline-helm" that deploys a Helm chart from a specific Git repository to the "{user}-cicd" namespace.
Step 2: Deploy/Observe the Argo CD Application
Apply the configuration in the file to create the Argo CD Application in the namespace {user}-argocd. This application will deploy the Helm chart for the pipeline app:
sed 's/$USER/{user}/' ~/workshop/content/modules/ROOT/examples/pipeline-helm-app.yaml | sed 's/$SUBDOMAIN/{subdomain}/' | oc create -f - -n {user}-argocdIn the ArgoCD interface you should see the successful deployment of the "pipeline-helm" application.
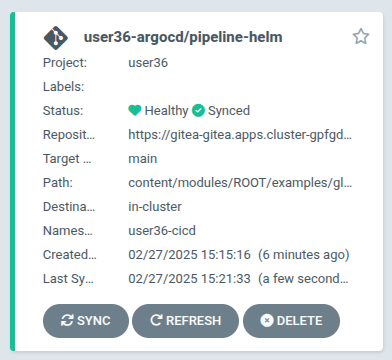
Now click on the "pipeline-helm" application. We will explore its deployment. Although you could deploy it through a Helm repository, we’re using a Git repository for this demonstration.
Access the application details by clicking on the "Details" button.
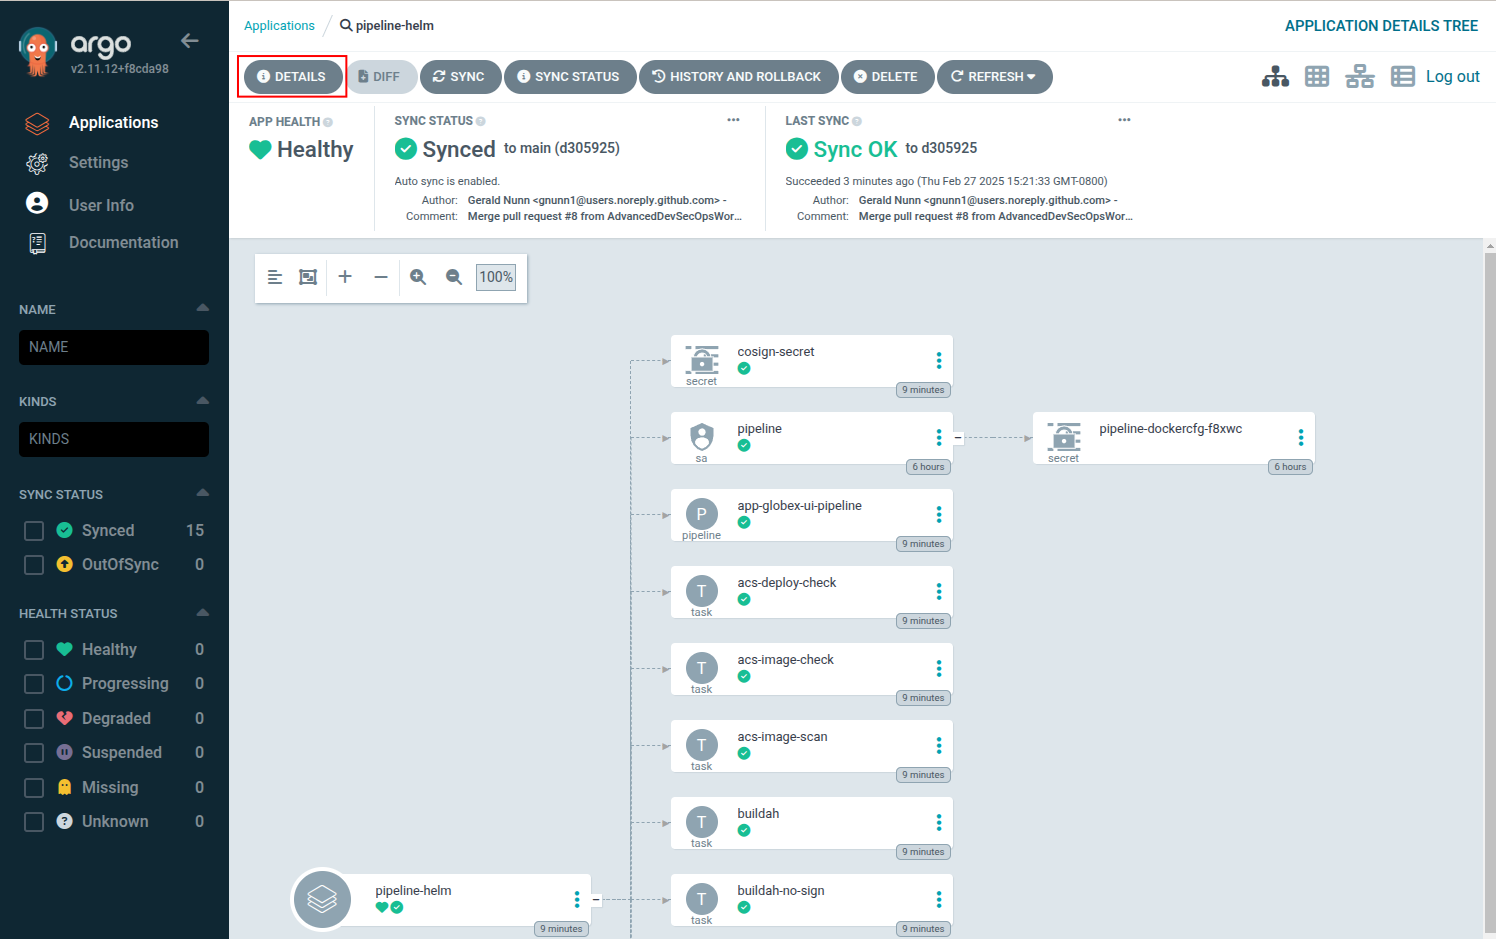
Next, click on "Parameters." You will notice that there is no separate values file as the application is deployed directly from the Helm chart.
All the files are now deployed in the {user}-cicd namespace, and you can see the full pipeline by accessing Pipelines → pipelines in the console, as shown below:

Custom values files
In this section we explore the use of custom values files with Helm charts. These allow you to tailor deployments to your specific needs. Custom values files offer the flexibility to override default settings without modifying the chart directly.
Explore the Custom Values Configuration
Begin by examining a YAML file named "pipeline-helm-app-custom.yaml." This file closely resembles the previous configuration but introduces a critical difference: it references a custom values file stored in the same Git repository as the Helm chart.
cat ~/workshop/content/modules/ROOT/examples/pipeline-helm-app-custom.yamlYou will notice a section in this YAML file that defines the name and path of the custom values file responsible for adjusting the Helm chart’s default settings:
    helm:
      valueFiles:
        - custom_values_1/values.yaml
Using ArgoCD to deploy a Helm chart with custom values files offers the advantage of tailoring and overriding the chart’s default settings, all without needing to alter the chart directly. This flexibility enables you to deploy the chart with different configurations to suit various environments or specific use cases.
| Since we already deployed the Pipelines Helm chart we will not deploy the custom values Application since the two Applications would fight over the same resources. |
Argo CD Application with Parameter Values
In this section, we’ll explore a YAML file where parameter values are embedded directly within the Application, eliminating the need for separate values files.
Examine the Parameterized Configuration
Begin by examining the YAML file named "pipeline-helm-app-para.yaml." This file, similar to the previous configurations, defines an Argo CD Application for deploying a Helm chart. However, a notable difference is the inclusion of all desired parameter values directly within the YAML file:
cat ~/workshop/content/modules/ROOT/examples/pipeline-helm-app-para.yamlapiVersion: argoproj.io/v1alpha1
kind: Application
metadata:
name: pipeline-helm-params
spec:
destination:
namespace: $USER-cicd
name: in-cluster
source:
path: content/modules/ROOT/examples/globex-ui
repoURL: 'https://gitea-gitea.$SUBDOMAIN/$USER/workshop.git'
targetRevision: main
helm:
parameters:
- name: globex.registry.url
value: 'registry-quay-quay-operator.apps.cluster-424xp.424xp.sandbox1774.opentlc.com'
- name: sonarqube.hostUrl
value: 'https://sonarqube-user49-cicd.apps.cluster-424xp.424xp.sandbox1774.opentlc.com'
sources: []
project: $USER
syncPolicy:
syncOptions:
- RespectIgnoreDifferences=true
automated:
prune: true
selfHeal: true
ignoreDifferences:
- group: ""
kind: ServiceAccount
name: pipeline
jsonPointers:
- /imagePullSecretsIn the 'parameters' section of the YAML, you will notice that we have included all the desired values directly within the chart.
Deploying a Helm chart through ArgoCD with integrated parameters allows you to customize default settings without modifying the chart itself or relying on external values files. This centralizes configuration management across different environments.
Conclusion: Helm on ArgoCD
In this module we learned how to deploy Helm charts using Argo CD and we looked at the different ways in Argo CD to pass parameters to the Helm chart. A brief summary of the Pros and Cons of the approaches we examined can be summarised as follows:
Custom Values File - Pros |
Built-in Parameters - Pros |
Customize Configurations:Create a separate values.yaml file to tailor configurations for different environments. Override default values in the chart’s values.yaml file with your specific settings. |
Environment-specific YAML: Manage YAML configurations for each environment using branches or tags. |
Rapid Modification: External values files provide an advantage over managing multiple Helm charts with individual values. Facilitates quick modification of multiple values through a single file change. |
No reliance on external values files makes local testing and debugging with |
Custom Values File - Cons |
Built-in Parameters - Cons |
Manual Updates: Requires manual updates to the values file, deviating from the default Helm charts behavior. |
Customization Limitations: Limited customization options due to YAML file constraints. |
Potential for errors or inconsistencies if the values file and chart configurations do not align. |
Necessitates a separate chart for each environment, potentially leading to redundancy. |
You can read more about the patterns for deploying Helm charts with Argo CD here.
In conclusion, this module introduced Helm as a Kubernetes package manager with templating capabilities. We explored its usage in ArgoCD, focusing on rendering Helm charts as pure YAML and customizing deployments with custom values and parameter values for flexible configuration management. This approach streamlines the deployment process and enables customized configurations without altering the Helm chart directly.